Showing posts with label vegetarian. Show all posts

Wednesday, July 3, 2013

Beet-za


So this is what you do after you put your beet greens in a pie. Again, not a 'real' pizza to my mind, but still good. I saw a picture in the paper a while back of a pizza with garlic tops, or scapes, on it. They had left the scapes whole which looks cool because they're all wiggly shaped, but the fact is that if you leave them like that, they are bloody awkward to eat. Plus, the blossoms themselves get all papery and unpleasant. My pizza doesn't have curly green ropes all over it, but it does have beet slices.

1/2 recipe of the pizza dough

2 smallish beets
6 or 8 good sized garlic scapes
3 or 4 tablespoons olive oil
cheese is optional
salt & pepper
fresh rosemary

Pre heat the oven as hot as it will go without being on broil.

Peel the beets and slice them extremely thinly. Put them in a covered dish and microwave them until they are tender, toss them with a dash of olive oil and set them aside.

Put a generous splash of oil in a skillet, more than you actually need to cook the garlic tops. Snap the garlic into pieces and saute on medium low with plenty of salt and pepper until the stems are tender.

Stretch out the dough. Gently drain the oil out of the garlic onto the dough and brush it around to coat the surface completely. Add a sprinkle of cheese if you want it, then the beets, then the garlic, discarding the blooms. Mince the rosemary and sprinkle it on top. Bake for 12-15 minutes, or until the dough is a little brown.

notes:

1. I altered the pizza dough recipe slightly for this by adding a couple tablespoons of olive oil to it, and I think the improvement is such that  I'll keep doing it. It makes the dough less all purpose and more focaccia or pizza specific, but what else do I really use it for?
2. I used a mandolin on the beets to keep the slices even. I have generally mixed feelings about that thing, because it is dangerous, and I'm scared of it, but also because it is a gadget and I disapprove of kitchen gadgets. But it has its uses.
3. If you use cheese, use something that has character. I used something gouda-like and a bit stinky. Parmesan or blue cheese would also be good.
4. Keep the heat somewhat low when cooking the garlic, it burns quite easily. It helps to add a splash of water to the pan and then cover it for about 2 minutes early in the cooking, the steam helps cook them quickly without toughening.
5. There is no reason you shouldn't use a whole recipe of pizza dough and make a bigger pizza. I just know that regardless of what I make, by the time I get it out of the oven David and I will be ravenous enough to eat the whole thing no matter how big it is. So I just make a pizza that is of a size that when we have eaten it all up, we have no regrets about doing it.
6. Garlic tops are also called Serpent Garlic, which is so cool it deserves capital letters!

Sunday, June 30, 2013

Beet Top and Potato Pie


This is a somewhat unimaginative picture of a thing I have posted about at least once before, but June is the season for using up random produce, because that is what there is. On the other hand, this pie was very tasty, and I have eaten it for breakfast, lunch, and dinner on several different days and it was equally good for all occasions. (I do wish I had remembered to add cheese. You can top it with some slices of brie if you want. Strongly recommended.)

 You will need:

1 recipe of crust for a 2 crust pie. I like a half whole wheat and half white flour recipe for savory pies. Mine is

1 cup AP flour
1 cup wheat flour
2/3 cup butter, cool but not freezing
3/4 tsp salt, or a bit more if you use unsalted butter
6 tablespoons cold water

Cut the butter together with the flour & salt until the butter is no bigger than peas. Add the water and mix gently just until it forms a raggedy ball, then refrigerate it until you need it.

Filling:

2 russet potatoes, medium sized
the tops off of 4 moderately small beets
a clove of garlic, crushed
a chopped onion
salt and pepper
plenty of butter

Pre-heat the oven to 375.

Cube and boil the potatoes. Drain and set aside.

Meanwhile, prepare the leaves. Start by thoroughly rinsing them. No matter how well the beets have been washed, little gritty things will have gotten stuck down in the stems near the beet crowns. Coarsely chop the leaves, keeping the stems separate from the leafy parts.

Saute the onion in butter until it's transparent. Then add the stems because they take somewhat longer to cook than the leaves. Add the leaves last and cook until tender. Mix everything together with the potatoes. Bash the potatoes up until they are not too big, but not totally obliterated either. Add salt & pepper to taste.

Roll the crust out into an 18" circle. If it's uneven and raggedy that's fine. Pile the filling up in the middle and flatten it out until there's about 5 or 6 inches of crust around the outside. Fold the extra crust loosely up around the filling and bake for 30-40 minutes or until the crust is as brown as you like it. If you can stand to, let it get browner than the picture. The crust is fine if you don't, but I think it's even better if it has more crunch. I was impatient. As usual.

Beets are a twofer. You can think of them as just a variety of chard that you grow because they have this bonus knobby part on the bottom which you can eat later. Possibly the reverse is true- somebody didn't care for the knobs, so they just started growing the kind of leaves that doesn't make any knobs. I didn't know this about beets until I started cooking them regularly, and then the appearance of the leaves tipped me off. Then I started to wonder what made people stop eating the tops as a regular thing- one time a vendor asked me at the farmer's market if I wanted him to cut the tops off my beets and I said no, eating the tops is half the reason to buy them whole, wasn't it? He agreed, but said that some people still didn't want the leaves. Seems to me that if you're going to buy a mess of greens, you might as well just buy beets with tops on them, and get two dishes out of them for the money. At a guess, eating beets at their smaller, newer stage, is a thing that people have started to do again relatively recently. A lot of farmer's market shoppers probably had parents who never looked at a beet before it went into a can, and if you buy a large beet that has been allowed to grow for a full season, the leaves will be pretty tough and unappealing. So, yeah. New beets are tasty, and the tops are good for eating.


Saturday, May 25, 2013

Garlicky Cheezy Taters


I actually looked at my blog the other day and I thought jeezus do I ever eat anything except tofu, broccoli, and noodles?

Yes, sometimes I eat cheese. Melty cheese is the best, and if you put it on potatoes, it is even better.

2 medium russet potatoes

2 T butter
2 T flour
1 clove crushed garlic

1 1/3 cup milk
1/2 lb grated cheese, maybe a little more
tsp Dijon mustard
dash of nutmeg
a pinch of lavender
pepper & salt

Pre heat your oven to 375.

Cut the potatoes into 1/8" slices. Butter a heavy, oven safe skillet and arrange the potato slices evenly in it. Set them on a medium low burner, and once you can hear them start to sizzle add 1/3 cup water, cover, and let them continue to cook while you make the sauce. No stirring.

In a smallish saucepan using medium heat, saute the garlic in butter until it is just barely starting to brown, then remove from heat. Mix the flour into the butter, wait a few seconds for the oil to soak into the flour, then add the milk. Put it back on the burner, and start stirring. When it starts to thicken, add the cheese. Stir until the cheese is completely melted, remove from heat, and season to taste.

Pour the cheese over the potatoes in the skillet. Top with additional cheese if you feel like it, and bake for 30-40 minutes, or until it's as brown as you want it.

Notes-

1. Yep, it's exactly like making mac and cheese. Plus garlic.
2. I used cheddar mainly, but I always think it tastes better with more than one kind of cheese. Be aware that cheap Swiss will be kinda stringy though.
3. This is very fatty. I like to put it on top of some arugula to eat it. It's like salad dressing.
4. Roux. I think the reason you melt the butter and then mix in the flour is to coat the flour particles with oil, which prevents them from clumping together when you add milk. Instead, the flour is distributed evenly throughout the liquid so that as the temperature rises you get a smooth sauce.
5. Remember not to toast the flour in the butter. If you do, the starches will have a reduced capacity to thicken the liquid, and the sauce may break, or separate into a bunch of little particles in a thin liquid. Tastes just as good, but it doesn't look very appealing.


Saturday, May 18, 2013

Rush job


Lately, dinner has been an un-photogenic, ad hoc sort of affair. There have been a lot of nachos. There was a pretty tasty chicken and chick pea pottage, but pottage does not look as good as it tastes. Lots of fried tofu. One time we ate grilled cheese and carrot sticks. It was delicious.

But! I did make a noodle salad the other night which I got a photo of before we ate it.

1 lb tofu
1 T dark soy sauce
1 T fish sauce
dash of sesame oil

1/2 cup peanut butter
1/3 cup light soy sauce
1/3 cup rice vinegar
1T sesame oil
1T sesame paste
dash of cayenne

chinese noodles
2 cups broccoli florets
salt

sesame seeds
cilantro
yellow bell pepper slices

Cut the tofu into 1" cubes and press it firmly to squeeze as much water out as possible.  Toss the tofu in a bowl with the next 3 ingredients and let it sit.

Combine the next 6 ingredients. This is the dressing. Mix well.

Boil the noodles in salted water. When they are about 30 seconds from being done, toss the broccoli florets into the pot with them to blanch. When the water comes back to a boil, drain the noodles and broccoli together. Run cold water over them to stop the cooking and remove extra starch from the noodles.

Toss the nooles, broccoli and tofu together with the dressing, then decorate each serving with sesame seeds, pepper slices, and cilantro if you like it. I like it a lot.

"It works perfectly!" he said.
So, what the heck have I been doing all this time? I made a scarf. An epic scarf. 2 months and 55,000 stitches of knitted scarf for my brother's 40th birthday. After I dropped it off, I thought maybe I should have gotten a picture of it, but I was basically sick of looking at it.

He sent me this picture of himself modeling it. Pete's One Scarf rules them All.

Friday, March 15, 2013

Lo Mien


Like chow mien, lo mien in its original form doesn't look much like what you're likely to get at a restaurant. If you order lo mien, you'll probably get a messy stir fry with boiled noodles mixed in. Depending on the particular formula, it can be pretty good, in a comfort-food kinda way. It is another one of those things that dad made reasonably often, but that it took me years and years to figure out that when you ordered lo mien for carry out, once upon a time, somebody was trying to make what dad just called 'fried noodles'. That's what lo mien actually means, anyway.

It's all about the fried noodle cake. Once you have that, you can throw pretty much any stir-fry on top. I put broccoli and tofu on it here. Honestly, I don't remember if there was a typical thing dad put on his. I was probably too fixated on the fried noodles to care in any case.

about 8 oz noodles
salted water
oil

Noodle cake!
Boil the noodles in salty water until they're al dente. Drain them and oil them pretty heavily, then put them in a heavy skillet on medium-high heat. Don't stir, just let them sit in the covered pan for about 6 or 7 minutes, or until the noodles in the bottom have fused into a nice brown crust. Flip the noodle cake over and fry uncovered until the other side has formed a crust, then slide the cake out onto a serving plate. Top with stir fry.

If you want to have what is in the picture, you need

1 lb extra firm tofu
2 bunches green onion, chopped
a teaspoon chopped fresh ginger
2 cups broccoli tops, cut small

half a cup water, maybe a little more
3 tablespoons oyster sauce
a splash of soy sauce
a splash of sesame oil
about half a teaspoon cornstarch
pepper

oil for frying

Cube and drain the tofu, and brown the cubes on medium heat until you are happy with how they look. Add a dab of oil to the pan if needed, then put in the onions and ginger. Stir until the onions are looking a little brown, then add the broccoli. Stir until everything is hot through. Mix all the rest of the ingredients in a small bowl until the cornstarch isn't lumpy any more, then dump it in the pan. Stir until the sauce is thickened and translucent.

Notes-

1. I've been over the stir-fry territory a few times already, so instead of boring on about it again I'll direct you here, for techniques.

2. The noodles can be any kind you like. Chinese, Japanese, white, buckwheat, fetuccini, angel hair spaghetti. It's all good. For visual interest, use a 50/50 mix of white and buckwheat soba. It'll be neato.

3. Keep an eye on the temperature during frying. Too low, and the noodles will never brown, too high and they'll burn before they fuse into a crust. You can keep it at medium heat for about 5 minutes, and if the noodles look like they're fused but pale, crank the heat just long enough to add color. Conversely, if they're browning fast, turn the heat down and just let it coast.

4. "Flip the noodles over" you say. The hell you say. Actually, it's not difficult. First, make sure the noodles aren't stuck to the pan anywhere. Work a spatula under them and all around the edges of the pan. Then hold the lid firmly closed and quickly invert the pan. The noodles will fall into the lid, and then you can scoot them back into the pan. Ta da!


Monday, February 18, 2013

Chinese Eggplant


If I'd known this would be worth writing down, I'd have taken a picture of the eggplants I used before I cooked them. The thing is, I am not a photographer any more than I am a chef. The eggplants didn't look special, except in hindsight, and before I cooked them I wasn't sure what was going to happen, so I didn't know that a visual aid might be useful later. At any rate, here is this eggplant dish.

about 1 1/2 pounds chinese eggplant- the long skinny kind

1/2 cup of the chinese noodle sauce from this post
6 or 8 green onions
2 or 3 slices fresh ginger
some hot pepper flakes, to taste
cooking oil
salt

a tablespoon of cornstarch

Mix the cornstarch with 2 cups of water and set it aside.

Cut the eggplant into 1/2 inch slices. I cut mine diagonally because it looks more interesting. Cut the green onions into 2 inch pieces.

Heat a skillet with a couple tablespoons of oil on medium-high until the oil just starts to smoke. Sprinkle a pinch of salt in the pan and put in half the eggplant. Stir the slices to get a thin coating of oil on them, then poke them down onto the pan to sear. Periodically turn the slices so that each piece gets evenly browned. When the first batch is done, dump them in a dish and repeat with the second batch.

Put a little more oil in the pan along with the onion, ginger and red pepper flakes. Stir until the onions have gotten moderately brown, then put the all eggplant back in the pan to heat it through. Add the noodle sauce and the cornstarch and water. Cook until the sauce thickens and turns translucent.

Notes:

1. Warning!!! This dish requires powerful ventilation! In the first place because you have to sear the eggplant, which creates smoke to set off your alarms, and secondly because of the part toward the end where you throw red pepper flakes in the pan. Capsaisin must volatilize easily; frying peppers makes it very hard to breathe. Leave your doors and windows open!

2. The eggplant should be slightly charred in places.

3. Even if your pan is large enough to cook all the eggplant at once, I recommend against it. Having it all in the pan together will trap steam around the pieces and will make them soggy. Cook in 2 batches and the water evaporates of easily.

4. Take your time and pay attention to the searing eggplant, but move fast and slosh everything together once you add the liquid. Once the sauce thickens, remove it from heat immediately or it will burn.


This is a version of the stuff you can get in chinese restaurants. It gets called a bunch of different things- eggplant in tangy sauce, Hunan eggplant, eggplant in garlic sauce, eggplant in bean sauce. Usually they make it too sweet and too goopy. They almost never sear the eggplant, which is a pity, because in a restaurant it's much easier to do. You can crank the gas jets up under a giant wok and flail around with a spatula the size of a shovel and whatever you want to cook is seared in moments. A home stove doesn't put out as much heat as a commercial stove. Instead, you have to compensate by making sure that you have a very heavy skillet and get it well heated before putting in the eggplant. Even so, it takes longer.

I don't remember that dad ever cooked this dish. In fact, other than eggplant sandwiches, I don't remember him ever cooking eggplant except one time: we were in China together my sophomore year in college, hanging around in some dodgy qi gong school. They provided all of our meals, and mostly the food was passable, sometimes it was a bit horrid. Eventually, dad got fed up with it, and the thing that put him over the edge was a dish of eggplant. It was a generic mess of goopy brown and purple, and he said that it bore no resemblance to what it was 'supposed to' be. So the next day, we went to the market for eggplant, which I think was something that perturbed our hosts, because going shopping is chores, and guests aren't supposed to need do any work, right? The actual cooking part was fine, because once dad got into the kitchen and shooed the disappoving cook out into the back yard, he could do his showmanship thing. I didn't look. That kitchen was spooky even before dad started making things ignite in great alarming whooshes. I was more or less expecting the whooshes, but the cook and our hosts were not. There was some gesticulating, and some loud commentary, generally admiring, and the cook shook his head a lot, but not so admiringly. Now I wish I had seen what dad did, because the dish turned out basically like shreds of eggplant jerky. It was chewy, and crunchy in parts, and had a few places where the flesh of the eggplant hadn't been dried or seared out, but remained slightly tender and almost custardy. I asked day what it was seasoned with, and he said just salt, pepper. No soysauce? Just a little "for color" he said.

The dish I made today does not resemble the dry fried eggplant dad made, but eggplant always makes me think of that.


Saturday, January 5, 2013

Brussels Sprouts Again


Every time I eat brussels sprouts I wonder what happened to me that I now enjoy them so much. The first time I ate them was the last time for about 20 years. Mom got some once, and was very excited about them. She kept saying how she'd loved brussels sprouts, even when she was a little kid. I thought that was a positive sign. She cooked them in butter, and the buttery delicious smell did not prepare me for the sulfurous, bitter, mushy stringy reality of eating them. It was an early example of the many things which were to instil a profound philosophical skepticism in me. So, it's totally awesome and will knock my socks off and all like that, will it? Well, I'll believe it when I see it.

Twenty years later I was washing dishes for a living. One of the kitchen managers (they hadn't got all hoity toity and started calling them 'chefs' yet) decided to make some roasted squash and brussels sprouts. To my surprise, I thought, "hm, those really don't smell like ass the way I remembered". It took me about another year to realize that I actually liked brussels sprouts. I think I've written 3 or 4 posts about brussels sprouts now. Here is another thing to do with them.

1 pound or more brussels sprouts, trimmed and halved
handful of raw walnuts
handful of dried apricots
dab of butter
pinch of salt
1/2 tsp nutmeg
1/4 tsp smoked hot paprika
tiny pinch of allspice
1 tsp sugar

chevre, because everything is better with cheese.

Put a dab of butter in a frying pan and add the walnuts, salt, and sugar. Fry on medium-low until the nuts are golden and the sugar has begun to form dark brown crunch bits. Toss evenly with the spices and remove from heat. Slice the apricots into sticks and toss them into the pan with the nuts, and give them a stir to get a little of the spices on them.


Put the sprouts in a lidded casserole with a little butter and a sprinkle of water. Microwave 3 minutes at a time until they are bright green and just tender. Toss with the nuts and apricots, serve with a few cheese crumbles.

David asked me how I come up with food ideas. I hadn't thought about it much before, but in this case, it went something like this:

1. I like the aforementioned sprouts and squash.
2. But I was bored with it.
3. So I thought about what it is about squash that makes it tasty.
4. That would be the fact that roasted squash is a little nutty, a little sweet, and has a little bit of texture.
5. So, use nuts, duh. Toasted ones are best.
6. And something sweet, but not very sweet. And not too squishy. Apricots are that, plus they have a nice color.
7. Bacon makes everything taste great, but I didn't have a hankering for that much grease.
8. So I added smoked paprika, which has a bacony smell.
9. But no protein, which is one of the things that makes bacon so good.
10. So, cheese.

And there you have it. Brussels sprouts with walnuts, apricots, and goat cheese.

Sunday, December 2, 2012

Not a Real Pizza


It's round, made of dough, and has cheese melted on it to glue down the other toppings. But I think that this is still not a real pizza, which must have tomato sauce on it. And mozzarella cheese. Everything else is negotiable. But this still looks pretty appealing. I found the recipe in the paper, and it does have many of my favorite things: blue cheese, nuts, fruit. Bread.

8 oz crumbled blue cheese
a dash of cream*
1 apple
walnuts
a handful of arugula
pinch of minced fresh rosemary
salt & pepper

half a recipe of pizza dough

Pre-heat the oven as hot as it will get without being on broil.

Smash most of the cheese with the cream until you have a thick lumpy sauce. Keep a few crumbs for the top of the pie. Stretch out the dough and spread the sauce on it, slice the apple and arrange a layer over the sauce. Throw on a handful of arugula, the nuts, the rosemary, and the remaining bits of blue cheese. Dash on a tiny bit of salt, and a good amount of pepper. Bake for about 15 minutes.

Notes:

1. *I didn't have cream, so I mixed a couple tablespoons of dry milk with about 3 tablespoons of water. It was just fine. You could use actual milk too, I guess.
2. The picture shows that I constructed my pie backwards, i.e. with the apples on top of the arugula. It was ok, but I like it when the leaves get crispy and slightly black around the edges, so I would rather have put them on the top.
3. My walnuts were raw and frozen when they went in the oven, which probably helped to keep them from burning up. Burnt arugula is ok with me, burnt nuts are not.
4. The original recipe did not call for arugula, but I think it adds something. The original also called for pre-cooking the crust a bit, which appears unnecessary and fiddly.

It may not be real pizza, but it is real tasty. The apple juices cook out and mix with the cheese to make a sweet-salty topping, the nuts are crunchy and buttery, the rosemary adds a little sharpness to balance the richness of the cheese. It's pretty good for lunch the next day, but straight out of the oven, when it's still hot, crunchy, and chewy, it is amazing.

Thursday, November 22, 2012

Birthday Noodles


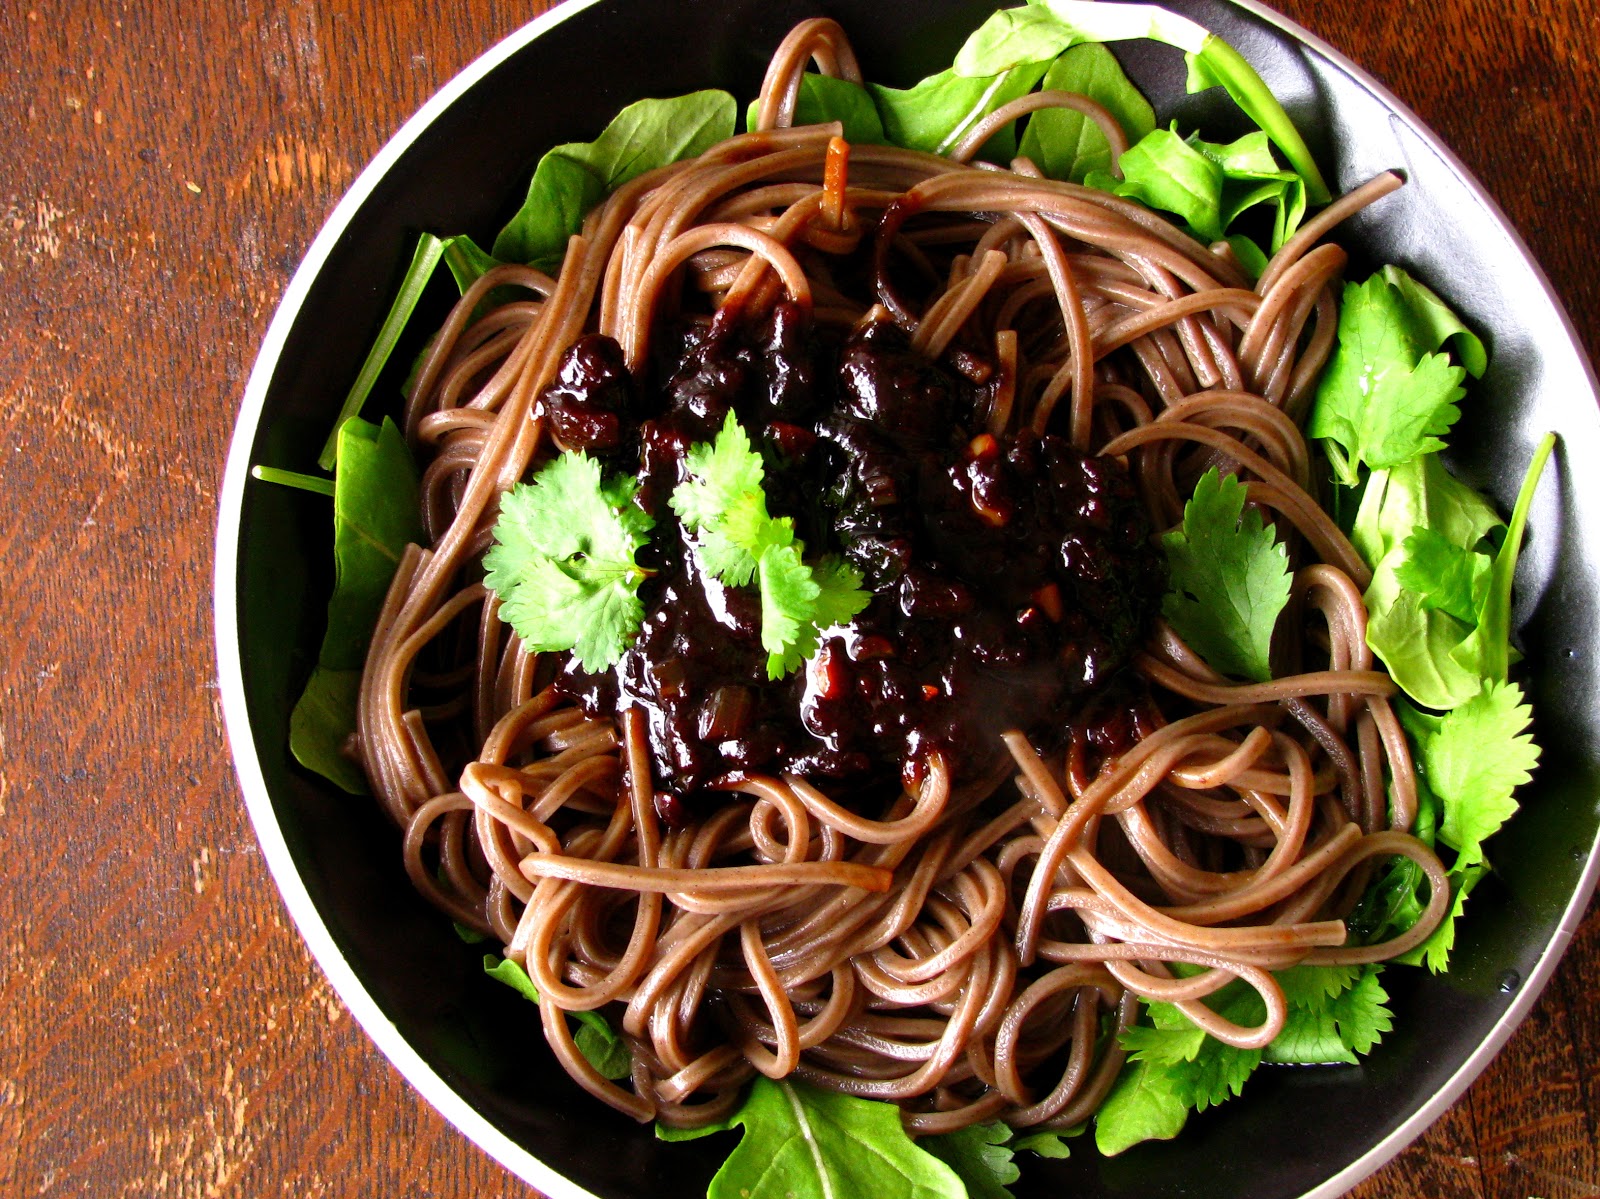
We had noodles for birthdays when we were little. (There were also crab legs. Different story.) I never thought about it until I was school age, and then it seemed kinda weird. Noodles fell out of favor for a number of years. Eventually nostalgia takes over, and I begin hankering after noodles again. This is a very Chinese-y thing to eat.

Chinese spaghetti sauce:

2 bunches finely chopped green onions
3 large cloves garlic, minced or crushed
1 T minced fresh ginger
2 T sesame oil
1/2 cup Master Brand black bean sauce
1/2 cup hoisin sauce
1/3 cup light soy sauce
1 T dark soy sauce

Put the oil, onions, garlic and ginger in a saucepan and saute on medium until the onions are translucent & wilty. Add everything else and stir for about 5 minutes, or until it is pretty thick and the oil starts to break out of the rest of the sauce.

Serve over noodles. Remember to put a fair amount of the noodle boiling water in the bowl. Greens are not traditional, but they taste good and look fancy.

A couple things:

1. I'm usually not particular about what brand  of something I use, but so far, Master Brand bean sauce (sometimes labeled Comrade Brand) is the only brand of bean sauce I've found that tastes like it should. Accept no substitutes.
2. Aren't all those ingredients just different versions of fermented soybeans? Couldn't you use fewer packaged ingredients or something? Probably...but this is easiest. Actually they all do something different. Master sauce is for texture and pungency. Hoisin adds sweetness. Light soy sauce adjusts the thickness of the sauce without diluting it, and dark soy sauce is a little smoky tasting. All of them have loads of fermented amine precursors or whatever it is that umami tastes like.
3. This really ought to have little bits of diced ham in it too, but I'm stingy and I didn't have any of that on hand. You can add 1/2 cup tiny ham cubes to the pan and brown them in a dab of oil before putting in the onions & garlic if you want. Then it will be pretty much exactly like we used to have it when I was a kid.
4. These are buckwheat soba. If you want to be traditional, you can get plain white chinese noodles in most grocery stores. Spaghetti is fine too. Dad used to make the birthday noodles, of course, but that's a whole 'nother thing.


Saturday, September 1, 2012

Mushroom & Spinach Pockets with Walnuts


I was going to make a pizza, but then I discovered that both my cheese & my sauce had grown hoary-bearded with age. I came up with this because several of the key ingredients are things I keep in the freezer, and are consequently unlikely to spoil. I was thinking of Pete's Kalezones*, but since I had no kale, I added nuts for texture.

1 recipe of the pizza dough I use for everything

8 oz mushrooms, chopped
8 oz chopped frozen spinach
1 large onion, diced
1 or 2 garlic cloves, crushed
a tomato (Optional. It was in the fridge, and I wanted it gone.)
1 tablespoon tomato sauce
1 teaspoon each of minced fresh rosemary & oregano
1/2 cup grated parmesan
1/2 cup finely chopped walnuts
salt & pepper
oil for frying

Pre-heat the oven to 450.

If your dough is in the fridge, get it out and let it start warming up.

Put a little oil in a heavy bottomed 3 or 4 quart saucepan. Saute the onions, garlic, herbs, and mushrooms until they are fairly dry and are starting to brown. Add the spinach and tomato, continue to cook, stirring occasionally, until the liquid from the spinach is pretty much gone. Remove from the heat and let cool enough to stir in the nuts & cheese without melting the cheese. Salt & pepper to taste.

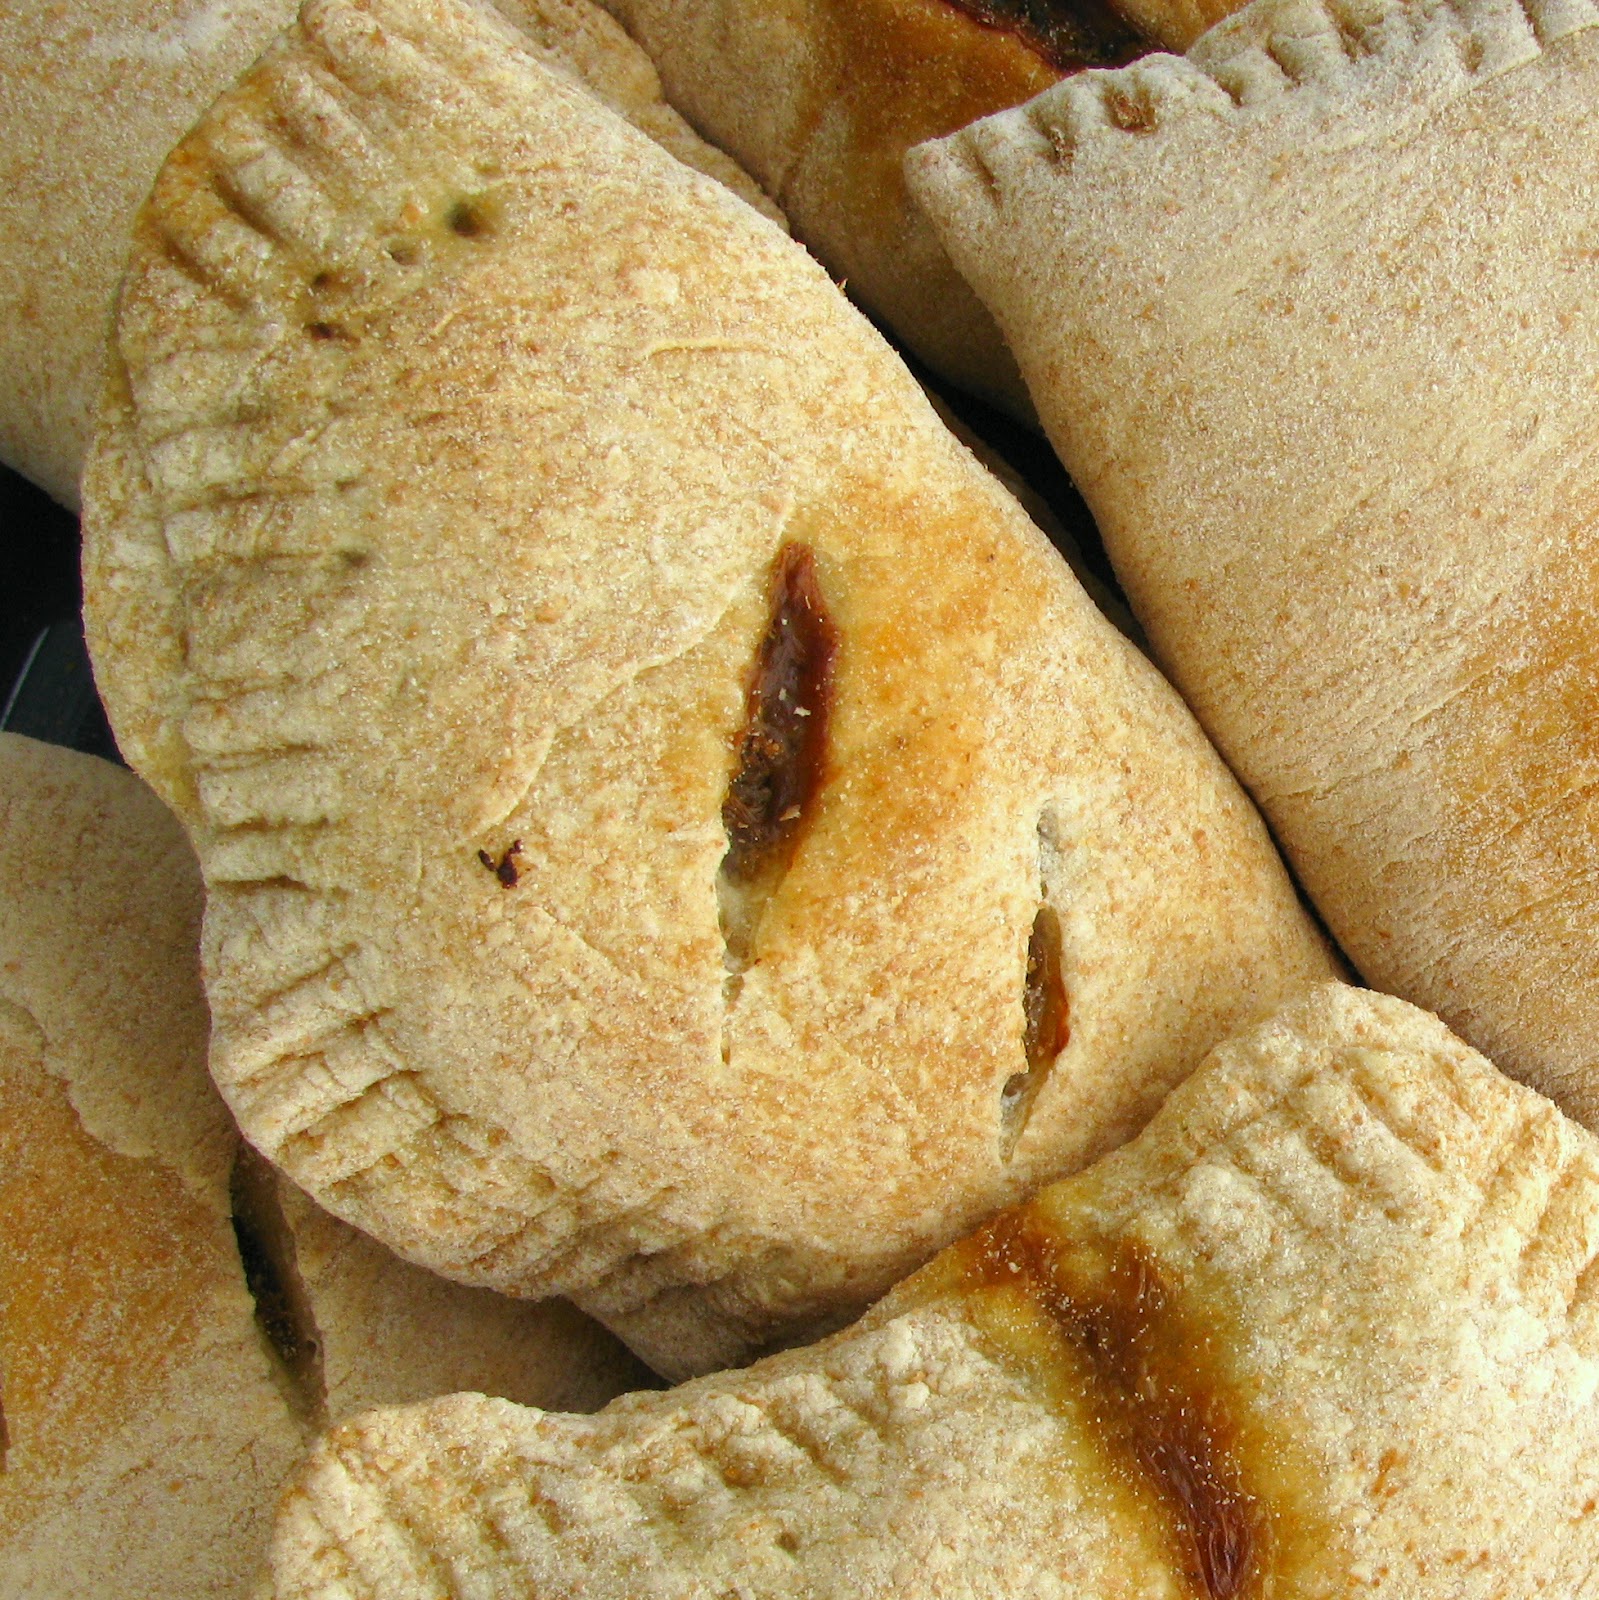
Cut the dough into 8 pieces, roll them out, and fold a scoop of filling into each one. Seal with a fork, and slash a hole in the top so they don't blow up in the oven.

Bake for about 23 minutes.

Notes!

1. Parmesan is pretty salty. Definitely you will want to hold off on the salt until after the cheese is in the filling to see if you want more.

2. On the other hand, it needs a good amount of pepper. Go ahead and put that in any time, actually.

3. Who the hell ever just has one tablespoon of tomato paste lying around? Not me. I divide up a can into blobs and freeze them. Then I can just pull one out of the tupperware when I want it.

4. Incidentally, I also keep walnuts in the freezer. Keeps the %*$$! meal moths at bay.

5. Don't knead the dough before using it. Just cut it up and flatten it out, or it will be too rubbery to deal with.

I got these done at about 10 pm last night, but they sure are good for breakfast. The dough is pretty chewy, and holds up well to the slightly chunky texture of the filling. They would probably taste good with hazelnuts too, but if you do that, I'd recommend toasting the nuts first.

* I thought I'd written a post about Pete's recipe for kale & cheese calzones, but now I can't find it. The procedure is roughly the same as this, but the filling is composed of kale and onions, with plenty of ricotta and some mozzarella, I think. What on earth happened to that recipe?...


Monday, July 9, 2012

Home made Gnocchi


3/4 cup flour
1 medium sized russet potato
1/2 teaspoon of salt
1 teaspoon minced fresh herbs
1/2 teaspoon baking powder

Poke a few holes in the potato, then microwave it for about 5 minutes, or until it's quite soft. While the potato is still hot, break it open and scoop the insides out. Let the  potato cool enough to handle, then press it through a wire sieve. Toss the potato crumbs with the rest of the ingredients, then gently knead everything together. You don't need to work it very much, just until the dough comes together into a reasonably smooth ball. Squeeze or roll the dough out into a rope about 1/2 inch thick and twist off little balls. Set the balls aside until you have a large pot of salted water boiling. Dump in the gnocchi and wait for the water to return to boiling. Reduce the heat to a medium simmer, then wait until the gnocchi flip themselves over and they feel slightly bouncy against a spoon, about 3-5 minutes. Drain and serve immediately with your favorite sauce, they are nowhere near as good the next day.

Some thoughts:

1. Pressing the potato through the sieve is really pretty brilliant. What happens is that the cooked potato cells get separated into uniformly small particles without the starches inside them being turned into a heavy glob of paste, which in turn allows the potato to combine very evenly with the dry ingredients. The recipe I read suggested it and I thought well, I might as well give it a shot. Good call.

2. Add more herbs and maybe a little more salt? Depends on how you like them, and what you're serving them with. You can serve them in broth, like mini matzo balls, in which case go lighter on the seasonings. If you're doing a sauce with more flavor, you might want to punch them up a bit or they will get lost.

3. Gnocchi are dumplings, so think about what texture you like your dumplings to have. Lighter, fluffier? This recipe will do it. Firmer, chewier? Leave out the baking powder and chill them slightly before cooking.

4. In any case, don't over-boil them. Gooshy is not the same thing as tender.

5. Traditionally, you're supposed to roll each gnocchi under the tines of a fork to create ridges for the sauce to stick in. Pain in the ass. By twisting off the dough bits, the twisted surfaces of each one will remain slightly shaggy, which amounts to the same thing with less fuss.

6. Don't be tempted to make them much bigger. If you make them too big, you will have to cook them until the outsides fall apart before the centers are done. The potato dough has subtle and delicious qualities, but the drawback is that it does not have as much structural integrity as an all-flour dumpling, or one with egg as a binder.

7. What's that business about 'flip themselves over' mean? Well, as they cook, starches expand and become less dense, also, steam accumulates inside the part of the dumpling that is underwater. Eventually, enough of the dough will be affected by the heat to reverse the buoyancy of the dumpling mass, and the lighter, i.e. more cooked, part of the dough will roll upwards to the surface. Neato!

Monday, April 16, 2012

What makes it stir-fry, anyway?


A few things.

1. Temperature. Hot. Like oh wow aggravate my anxiety disorder hot stove hotsie hot.
2. The order things go in the pan. Think about what you're cooking. Does it take a while to be done, or do you just need to show it to the frying pan before you eat it?
3. Keep it simple already!

I have sat around watching my co-workers at the staff cafeteria swilling that revolting pap they call 'stir-fry bar' once too often. A morass of leathery meat bits, celery, onion chunks, mushrooms, carrots, cabbage, baby corn, pea pods, and bean sprouts weltering in a steam tray accompanied by uncle ben's minute rice and four basins of liquid which differ in color and viscosity if not in flavor is NOT STIR FRY. If it was ever stirred, I can't attest to it, and it sure as hell was never fried. I don't give a crap if it isn't authentic, but for chrissakes, that isn't even food.

Take a look at my dinner. Tofu and baby bok choi stir fry. 2 ingredients. That's it. I do distinguish between seasonings and ingredients. Ingredients are what you make the food out of. You make a stir fry because you have one or two good ingredients and you want to know what they taste like together. Ingredients are what you've got that's worth eating a meal of. Seasonings are what you use to spruce things up a bit, that's all. Seasonings are the little whatevers you put with your ingredients that make you go 'Oh, hey, tofu is good. I could really fancy me some stir fried tofu for dinner. Seasonings are not for covering things up with, and ingredients are not made better by throwing a lot of them into a kludge and reaching for the viscous brown/yellow/orange stuff.

Ingredients: half pound each of tofu and baby bok choi
Seasonings: oil,onion, ginger, salt, pepper, sesame oil and soy sauce.

You don't need a wok. I hate those pseudo-woks with flat spots on the bottom anyway, but that's a whole different set of problems.

Use a fairly large, heavy, frying pan. No non-stick pans!  I use cast iron.  Put 2 or 3 tablespoons of vegetable oil in the pan, along with just a dash of sesame oil for flavor. Turn the burner on to medium high and when the oil shimmies in the pan a bit, salt the pan and set about a half pound of tofu cubes in it. Ignore it while you mince a teaspoon of fresh ginger and cut half an onion into very thin slices. Chop up the baby bok choi a bit too.

By that time, your tofu should have developed a nice brown on the bottom. If it hasn't, the burner isn't hot enough. Turn it up a little. When the tofu has browned on one side, flip it over and shove the chunks over to one side of the pan. Add a little more oil if necessary, then put in the onions and ginger. Stir the seasonings around a few times until the ginger looks a bit brown but not burnt.

Add the greens, stir everything up and then sorta poke the greens down into the pan. Stir and poke for about a minute, and add a tablespoon or two of water if the greens are too dry. Add a few shakes of pepper and a splash of soy sauce. It's done when the dark green parts are wilty and the light green parts are just going transparent around the edges.

There's fried rice in the picture. Fried rice is a kind of stir fry, folks, so apply what you just learned.

Ingredients: Stale cooked rice, an egg.
Seasonings: garlic, salt, black bean sauce, oil

Hot up your pan with some oil and salt. Crush in the garlic to brown it for a second, then stir in 2 cups of rice and a tablespoon of bean sauce. Cover the rice for a minute, until it is hot through and developing crusty places, then crack in the egg. Stir until the egg is cooked.

I think I've only made one post about stir-fry before because it just doesn't seem very complicated to me, you know? It's really just pan-grilling a few things, and throwing some marinade stuff in the pan with it like a lazy-ass. Stir fry was what there was to eat in my house when I was a kid on the nights when there wasn't soup. It wasn't exciting by any means, but I do remember thinking that mostly it was pretty good. So then I grow up, and there is the staff cafeteria, and it just irks me to see people eat such nasty stuff, thinking that it has anything at all to do with stir fry.

Thursday, April 5, 2012

Falafel update


The first time I made falafel, I stuck to the traditional fried version. It was delicious. But deep frying is messy, and it is an amazingly inefficient way to use oil. This time I baked them, and I also remembered to take pictures.

Baked Falafel

Use the ingredient list from the original falafel recipe. Assemble the  ingredients as per the original recipe too, up until the cooking part. Then,

1. pre-heat the oven to 450
2. add 1/3 cup oil to the falafel mix and combine well
3. drop 2" blobs of mix onto an oiled cookie sheet
4. bake for 30  minutes.

They taste remarkable similar to the fried ones, but there is a tendency for them to be a little dry. I have some ideas about how to fix that, to wit:

1. Soak the beans longer. I got impatient, so these were under water for only about 12 hours. 24 to 36 hours might be better.
2. Leave a little more water in the mix, duh. Bean starches need a deal of moisture to cook nicely.
3. Make sure the blobs are big enough. If they're too small, they'll dehydrate.
4. I might make these in a mini muffin pan next time. Less surface area exposed to air, for one thing, and for another, if I make a moister batter, the muffin tins would help the bits keep their shape.

Really, this is a very nice way to avoid having a bucket of semi-used oil and a slick of grease on everything in your house. Moreover, its far less work. No standing around hovering over your fritters, just plunk them in the oven and set a timer. I think with some tweaking, this recipe could be improved enough that it would be comparable to the original. If I make it again, I'll tell you how it goes.

Tuesday, January 24, 2012

Noodles and greens, noodles and beans


I don't like bowtie pasta. It reminds me of my college cafeteria, a thing which was distressing and, on at least one occasion, traumatic. They served a lot of bowtie pasta. I don't like the name farfalle either. It sounds both prissy and ludicrous.

Elbow noodles, on the other hand, generally make me feel pretty chipper. It's true, I avoid cold macaroni salad, but elbow noodles themselves are not the problem. I just think letting your pasta go cold and mushy and then putting mayonnaise and pickle relish on it is gross. I like elbows. Elbows are what you make mac & cheese out of, and that's a good thing. Mac & cheese was a very special food in my childhood, and I retain great admiration for it. Also, the shape of the noodle itself is enjoyable. If you cook them to the right texture, you can squoosh the air out of the noodle with your lip and cause the elbow to suck itself onto your tongue when it bounces back into shape. I think mom didn't like that aspect so much, but I did. Maybe she just didn't like the fact that having attached a noodle to my tongue, I was eager to display the result to my dining companions. As an adult, I'm sure she was right about that.

I don't actively refuse to eat bowties, it just takes something kind of special to make me thing 'hmmm, I'd like to eat some of those.' That's what was so unusual about this recipe that a friend posted a link to. I got a bit excited about it. Pasta, nuts, greens, beans, garlic, sounds good. Even if the picture did have bowties in it.

1 cup small pasta, like elbow noodles
1 bag Trader Joe's baby arugula
1 large clove garlic, maybe 2, crushed or minced
1/2 can white beans, rinsed
1/2 teaspoon broth concentrate, maybe a smidge less
toasted walnuts
olive oil, salt, pepper

Boil the noodles in salted water, and save about a cup of the boiling water when you drain them.

In a saucepan big enough to hold all the ingredients comfortably, heat up a couple tablespoons of olive oil. Saute the garlic for a minute, sprinkle on a little salt, and put in all the greens. Stir them up until they are wilted and tender, then add the beans, the pasta and the broth concentrate with some of the pasta water. Stir to combine, and then let it heat through. Serve with nuts if you like them.


Points to consider:

1. On a practical level, elbow noodles are about the same size as beans, which makes it easy to keep the pasta to legume ratio constant throughout the dish. This is good for eating, but not as interesting to look at as having something like bowties. I'd rather have my food eat good than look good.
2. On the other hand, the arugula will have an insurmountable tendency to clump up. You will have to take a fork and comb the greens apart a bit in order to eat them with the noodles and beans. You could chop the greens slightly, but somehow that seems...incorrect. I could just be fussing over details.
3. The finished product can be anything from quite dry, almost like a warm pasta salad, to something more like soup, depending on how much liquid you add back to the pot. It's up to you. I made it dry this time, because I want the noodles to be at least semi-solid tomorrow when I take the leftovers for lunch, but if I was pretty sure it was all going to get et at one sitting, I might make it more soup-like.
4. Yes, you want that whole bag of greens. At least. They shrink to nothing, pretty much.
5. The only reason this isn't vegan is because I use chicken stock. You could just as easily use veggie broth.

Monday, November 28, 2011

Smelly and Non-Photogenic


Brussels sprouts are a thing I have only enjoyed for the past few years. They are undeniably stinky. They are also bitter, and taste a bit like dirt, and have a strangely squishy yet fibrous texture when they're cooked. They are not something you should ever try to feed to children, because they will resent you for decades. Trust me, there is no amount of nutritional advantage which is conferred by brussels sprouts alone that will justify trying to make kids eat them. Just feed them something less yucky.

Brussels sprouts are way beyond Food for Newbies, and this recipe is not for the faint of heart. It's quite pungent. Bonus round: I ate it with beets. Back in September, I ate some beets at a fancy restaurant. I would never have thought of putting sesame oil on beets, but it was pretty darn special. They made it look really cool by using 2 colors of beets, and putting a chimichurri-type condiment on the plate, and some other stuff, but the really important things were the sesame oil and the ginger  vinaigrette. There might have been jicama matchsticks in there too, I can't remember.


I think this really is gratin, because it has a cream sauce, and cheese, and garlic, and a crumb top.


Brussels Sprouts Gratin

1 lb steamed brussels sprouts, sliced thin
1 onion
1clove garlic
a little butter for frying
a pinch of salt

leftover cheese, several kinds- I used about 2 ounces of a very smelly blue, about an ounce of medium cheddar, and one lonely slice of smoked gouda
1 T butter
1 cup milk
1T flour
a shake of black pepper

1 slice of rather stale bread
1/2 teaspoon minced fresh rosemary
1 teaspoon butter
a little grated parmesan (I used the kind in a can)

Pre- heat the oven to 375.

Use an oven proof skillet. Slice the onions thinly, mince up the garlic, and saute them in butter and a pinch of salt until they are quite tender and transparent. Add the sprouts and continue to cook until heated through. Set them aside.
To make the sauce, grate or finely slice the cheese. In a small sauce pan on medium-low heat, mix the butter & flour. Fry the flour for about 2 or 3 minutes, then remove from the heat. When it has stopped sizzling, add the milk and stir thoroughly before putting it back on the burner. Keep stirring. When the milk is starting to steam, and is just beginning to thicken up, add the cheese. Stir until the cheese is all melted, and the sauce is thick. Pour over the sprouts.
Smash or grind up the stale bread and fry the crumbs briefly with the butter & rosemary. Top the sprouts with the crumbs and parmesan, and bake uncovered for 40 minutes.

Brussels Sprouts tips:

1. You could use raw sprouts in this recipe. Clean and slice them, and add them to the onions. It will take a little longer to saute them, but it will be fine. I started with steamed ones because I bought a whole giant spear at TJ's and cooked them all at once so that I could eat them for the rest of the week without too much fuss.
2. The kind of cheese in the mix is not too important, I was just using up leftovers. I will say that the stinky blue cheese is pretty excellent in this. It was too strong to eat by itself, but it was good for cooking.
3. It is probably important to take the roux off the heat before adding milk. I think it prevents you from overheating the sauce too fast and causing it to break.
4. Roux!?!? Er, I mean, the flour fried in butter.
5. I don't usually have fresh milk in the house, because I don't drink it. I used powdered milk reconstituted according to the package instructions. Nobody will ever know.
6. This recipe would be good for company, at least, a company of adventurous eating adults. It is very rich, and is nice in cold crappy weather when you just want to hang out, watch movies, and have a drink and a nosh. 


Sesame Beets

4 or 5 medium size beets
2 or 3, 1/8"-thick slices of fresh ginger, cut into little matchsticks
about 4 T rice vinegar
about 1 T palm sugar, or brown sugar. I'm still trying to use up my palm sugar.
1/4 teaspoon salt
sesame oil to taste

Peel the beets, and cook as you ordinarily would.* I tend to slice them up first and then microwave them. When the beets are tender, put the ginger bits in a sauce pan with 2 tablespoons of vinegar, the sugar, and the salt. Simmer them until the vinegar has reduced by about half, and has formed a syrup. Add the remaining vinegar and pour over the beets. Toss with sesame oil.

You could get a little fancy by saving the ginger slivers to sprinkle on top of the beets after you toss them in the vinaigrette, and maybe adding a bit of chopped cilantro. Obviously, I just wanted to eat my lunch already.


* General digression on beets: Beets are another thing you should only feed to children under select circumstances. Use caution, and accept rejection easily. However, if you're going to cook them anyway, there are lots of ways to do it. You can boil them, but I prefer not to, because then you just dump out the boiling water along with half the beet flavor. You can steam them, with very similar results, and more equipment. You can roast them with their peels on in a 350 degree oven, which really makes them taste the best but takes forever, and then you have to put them in tupperware, let them steam loose from their skins for about 10 minutes, then peel them. It's easiest, in my opinion, to skin them with a yankee peeler, slice them thinly, and microwave them for 3-5 minutes at a time until they're tender. Add a couple tablespoons of water to create steam, and stir them frequently. You need a container that has a good lid, and be aware that it may spit beet juice all over your microwave if you let it get too much water in it.

Wednesday, October 12, 2011

Migas


Migas is to the latin world what fried rice is to asians: a method of using up leftovers. I read that migas is just the word for crumbs, and while the dish is usually made with tortilla chips or fried stale tortillas, I had a cornbread muffin. I took the word crumbs literally, and rooted around in the fridge for whatever else I could find, and here is lunch.

Fried squash & cornbread migas

some roasted summer squash pieces
a stale cornbread muffin
some chives or scallions, minced
a bit of bell pepper, diced
an egg


Chop the muffin into 1" chunks, and fry them in a little oil or butter along with the squash and pepper bits until they're brown and the muffin is a bit crispy. Sprinkle in the onions or chives and a dash of salt & pepper, then crack an egg over the lot. Poke the egg around a bit so you have a nice mix of egg, bread and veggie bits. Salsa, yogurt & avocado are optional, but the avocado is especially nice.

Saturday, September 24, 2011

Falafel!

You can always tell when I'm extra pleased about something, because there are exclamation points. So, Yes! Falafel! I'm from Ann Arbor. This is not mere non sequitur, Ann Arbor is where Jerusalem Garden* is, and thus, all other falafel is to be compared to theirs, in my mind. When I was a small child, my parents wouldn't get us food from there. This was not, I maintain, due to pecuniary embarrassment, but rather due to dad's prejudice against the very idea of middle eastern food. It was certainly cheap- cheaper than Portland food cart cheap- although prices rose latterly.

Erica Knopper gave me my first falafel. I think she asked me if I liked falafel, and I said I didn't know what that was, and was it spicy? She said it wasn't 'really' spicy, which to a kid is just like saying Warning: grownup trying to get you to do something dreadfully uncomfortable. She must have realized this (I'm sure my skepticism was obvious), and offered to let me try some of hers.

It was delicious. It was rolled in pita, with lettuce and tomato, and it was crunchy, and warm, and savory, and sour (that was the tahini sauce), and just a bit spicy- I think I ate most of one of their falafel with hummus sandwiches. I used to hang out with lots of earnest hippies back then, and they cooked a lot of earnest food that usually tasted a bit odd to me. It didn't cross my mind until years later that what they were trying to do with all that earnest cooking was produce the experience of eating that falafel. It was vegetarian, it was comfort food, but more than that, it was just really good food.

 I moved here a little over 3 years ago, which was a little over 20 years after I ate that sandwich. In New York, I worked with a rapidly changing stream of several hundred energetic and quirky people in their 20's, and so when I ended up at a bar here in southeast a couple years ago, it didn't surprise me that I recognized one of the bartenders. Lots of people I'd worked with had moved to Portland, I got on the bandwagon pretty late. But I couldn't remember this dude's name. So finally I did the "hey, not to be creepy or anything, but haven't we met" and he said well, you look pretty familiar. New York? I say. No, not there, Michigan, he says. And it turns out that he was the guy who made my falafel patties at Jerusalem Garden before I left town. I sorta wish now that I'd got his number, or given him mine, just to hang out maybe, but I was feeling bashful, and he was at work, and well, you know. It was a little weird.

Sometimes I really miss that falafel. I'm not going to say that my falafel is at all the same as the falafel at J Garden- I used black eyed peas- but it's got the right something-something to it.

This is a single-girl sized recipe,which makes about 8-10 2-inch balls. About enough for dinner one day, and lunch the next.

3/4 cup dry black eyed peas

half bunch green onions, chopped-this is around 1/2 cup
1 teaspoon fresh thyme, minced very fine
1/2 teaspoon garlic powder
1/2 teaspoon coriander seeds
3/4 teaspoon ground cumin
3/4 teaspoon salt
1/8 teaspoon cayenne
1/4 teaspoon paprika
a smidge of black pepper
1/4 teaspoon baking powder

Cover the beans with at least 3 cups of water, and leave them to soak for about 24 hours. If you can stir them up and change the water somewhere in the middle, even better.

Rinse the beans and drain them thoroughly. Put them in a food processor with the onion and process until the mix looks like wet, green cornmeal. You'll have to keep scraping down the bowl. Add all the seasonings and process to combine.

Put about 3 inches of oil in a deep pot. Heat it to about 350 degrees, then drop spoonfuls of falafel into the oil. They take about 10 minutes to cook. Drain on paper towel for about 5 minutes, and eat with tahini dressing. And pickles, if you have 'em.

Oh yeah, tahini dressing.

1 tablespoon lemon juice
1 tablespoon water
1 tablespoon tahini paste
salt, and a pinch of cayenne

There's no reason you can't use all lemon juice, but I prefer it slightly less tart than that.

Notes-

1. I have a candy thermometer. I thought I'd never use it, but it's great for this. If you don't have one, test the pot by dropping a bit of dough in. Remember the noodle video? Falafel should only sizzle up about half that hard.
2. The temperature and thus, cooking time, is important. 10 minutes seems to be enough time to develop a dark, crusty outside, and a fully cooked interior. If the oil is hot enough to brown much faster than that, the insides might not be cooked, and if it isn't hot enough, the falafel will just be sodden and greasy. They will be quite dark when they're done.
3. Balls rather than patties are best for deep frying. Keeps the proportion of crust to middle balanced.
4. It is also important to let the balls stand for several minutes, because they will keep cooking for a while, which helps with the texture.
5. Most importantly, this recipe used raw dried beans, unlike many which call for a can of cooked. Here is my pseudo-scientific hypothesis: in canned beans, the starches are already cooked. When you mash them, the starches get gummy, and no matter how carefully you cook them, your falafel will be dense and puck-like. With raw beans, running them through the food processor before they are cooked breaks open all the plant cells and dumps the raw starches out into a slushy suspension of fiber and water, pretty much like, say, cake batter. Thus, when the falafel is cooked, the starches expand and remain subsequently unmolested, resulting in a substantial, but bread-like texture. Baking powder undoubtedly helps.

Other thoughts-

As I said, these are not quite like J Garden falafel. The only real reason I used black eyed peas instead of garbanzos is that those are what I had. But I think it's a pretty good knock-off. Of course, I asked the Falafel Guy (who did tell me his name, but I don't know that he'd want to be identified) about the secret formula for Jerusalem Garden falafel. He couldn't tell me, not having been granted the knowledge, but I'm pretty sure he said that there was thyme in it, and powdered garlic, and that they used a lot of green onions. Thyme was not a feature of any of the recipes I read before making mine, nor were garlic powder or scallions. I suspect the first two are the key flavor ingredients that make the recipe unique- thyme is not mentioned at all in any of the formulae I referred to, and garlic is always fresh. It's the scallions which make the dough bright green, and if you wanted to enhance the green effect, you could use just the tops of them. I'm going to have to try this with actual chick peas some time. The eyes of black eyed peas leave little dark flecks in the dough, which doesn't affect the flavor or texture, but sort of annoys me aesthetically.


*I could wish that their website was as awesome as their food, but I suppose I'm glad they concentrate on the essentials.

Monday, September 5, 2011

Blueberries, Cashews, Vinaigrette


At some point, it finally got warm enough for me to be interested in eating greens. I've never met a store-bought salad dressing which I liked enough that I thought I would consume a whole container of it before it went bad. They're usually gooey, or slimy, or intensely sweet, or all of the above. Even the better kinds are just sort of Ok. No big surprise there- by definition they are designed for the mass market, and for a degree of shelf-stability undesirable in a home made food.  Most of the time I just dash some balsamic vinegar and olive oil on my salad and call it good. Unfortunately, this can get a bit monotonous. Here's something zippier:

Sesame Ginger Vinaigrette

2 tablespoons fresh ginger, grated very fine
1 small clove garlic, also grated very fine
1 teaspoon brown sugar
1/4 cup light soy sauce
1/3 cup rice wine vinegar
2 tablespoons sesame oil
2 tablespoons olive oil

I find that keeping my ginger root frozen makes it grate better, but that's the closest this recipe gets to food-ninja technique. I keep the dressing in the fridge and slop it on greens, or chunks of tofu. It's pretty good on rice too. You have to be a bit careful though because it'll give you garlic mouth somthin' powerful.

My salad hasn't got anything particularly Asian about it, but the dressing reminds me of the stuff that comes on salads in Japanese restaurants. I tried this with raisins and pine nuts, but I think I like the blueberries better. They almost have a citrusy thing which does well with the garlic and sesame. I could go either way on cashews vs. pine nuts, but visually, the cashews are more interesting.

Sunday, August 28, 2011

The possibilities of peas


I first made this with chick peas. I still like it with chick peas, but I recently started using blackeyed peas for a bunch of different things. They taste more interesting than most other types of beans, also, a) I don't use up a whole can of refried beans before they go bad and b) a can of most any type of beans costs about a buck, while a pound of dried peas costs about 75 cents. I can make as many or as few as I need, and I find they don't seem to need as long a cooking time as other dried beans- probably because they're very small, but probably also because I do pre-soak them. This used to bother me- it seemed like fiddly sort of thing to do. But then I realized that leaving them in a tupperware of water in the fridge over night, or the next night, and frequently the night after that until I decide that yes, today is the day I want them actually realizes a net reduction of fiddle. There are a couple things I've found that are good to do before you put them on the stove:

1. Shake them up and then rinse them well. Gets rid of more indigestible carbohydrates. Makes you more polite to your companions later.
2. Season them! Duh right? Not really. Cooking the seasonings in rather than cooking then seasoning makes a huge difference.

If I know I want to make refried beans with them, I put in salt, a bay leaf, pepper, cumin and a good shake each of onion and garlic powder. Yes, fresh is good, but this is refritos, people. You're just going to cook the bajeebus out of 'em, so it don't make a difference. Less fiddle! If I don't know what I'm going to do with them, I just add salt and a bay leaf. That's what I have in the picture here.

Along with the blackeyed peas, I have a tomato, some lentils (I like the kind called 'green french lentils' because they seem to hold their shape well), some kalamata olives, a few fresh mint leaves and some cumin, ground coriander seed, and a dash each of olive oil and the olive brine. I usually like to put in a yellow bell pepper for color, and if you want more green stuff, the recipe originally called for flat leaf parsley rather than mint, but I didn't have those things today. As I said, the first version of this had chickpeas in it, which make the salad taste nuttier. Blackeyed peas have a grassier taste which is rather nice with the coriander and mint.

But what else do I do with them? In the winter of course, I cook them with bacon. They are pretty tasty as an ingredient in other salads, and sometimes I get lazy and rather than bother to smash them into refried beans, I just sprinkle them on my nachos before they go under the broiler. I have a recipe for black bean and sweet corn fritters, which I want to use with blackeyed peas. They're good with migas, too.

Incidentally, does anybody know where I can get some pigeon peas?

Saturday, August 28, 2010

What goes with carrot sticks?


Even I wouldn't want to live on pastrycream alone. I'd miss out on too many other things. Here's a plate of bits an pieces. I had carrots, I wanted something else after I'd polished off the ranch dip. Hummus goes with carrots! And whaddaya know, the sesame paste I'd been using for my chinese noodle salad workd just dandy for making hummus. But you need something texturally as well as visually interesting to eat with hummus, carrots or no carrots. So I made taboulli. I know you're supposed to make it with bulghur, but I didn't have any of that, so I used a little quinoa. Homemade wheat toast triangles is pretty pretty good with hummus too, if you don't have any pita. Plus olives and yogurt of course, while you got the whole mediterranean thing going.

Hummus:

half a can of garbanzo beans, with the bean water
juice of one lemon
a dash of cayenne
2 tablespoons of tahini aka sesame paste
a small clove of garlic
a couple tablespoons of olive oil
salt to taste

Put everything in a food processor and puree it. Washing the processor is the hardest part of the recipe; it is, to be perfectly honest, the reason I don't make hummus very often. Now you know just how lazy I am.


Taboulli:

1/4 cup quinoa

1/2 cup parsley before chopping
a dozen small mint leaves
1 small tomato
salt
olive oil
juice of 1/2 lemon
dash of cumin
dash of cayenne
pinch of ground coriander

Bring the quinoa to a boil in about a cup of water. After it has boiled for about a minute, drain the water off, put in fresh water and cook as you would pasta. Drain the quinoa and let it cool completely. It helps to have a pretty fine sieve. Once the grains are cool, mince the parsley and mint, dice the tomato and toss all the ingredients together.

Now that I think about it, that's a lot of fuss just to eat my carrot sticks.