Friday, December 31, 2010

Ba Bao Fan


The name of this dessert was baffling to me when I was little. In a typically oriental piece of transliteration, dad used to call it "eight precious pudding". I thought he was saying "a precious pudding", which made more sense than ba bao fan. I mean, I got that the 'fan' part meant rice, but the rest- bobble fan?- ba bowl fan? Huh. Beat the hell out of me. I think I was in high school when I finally figured out that the name means something like '8 things in rice'. There's some kind on chinese numerology business going on here. 8 is an auspicious number, so I think the implication is that if you have eight things in the rice, that must make it fancy. If you look up recipes online, a lot of them will call it Eight Treasures Pudding. 

But never mind! It is delicious, and takes virtually no effort to make, especially if you buy the sweet bean filling in a can. Here's what you need:

3 cups sushi rice. It will say 'short grain sweet rice' if you aren't in the habit of buying it.
2 or 3 tablespoons canola oil, or lard of you're feeling particularly authentic. Duck fat would be even fancier!

1 1/2 cans sweet bean filling- there were 2 kinds at the store, and I recommend the one in the green & yellow can. The one in the blue package isn't as good, which I might have known at the outset. The sketchy outdated label design on the L&W brand made me suspect that the contents would be more authentic in much the same way that having a frightening washroom in a chinese restaurant augurs well for the quality of the food. It's a cultural thing.


toasted, unsalted cashew nuts
ginko nuts
candied orange peel or pieces of candied orange
dates- regular, or chinese red ones if you can find them.
prunes
golden raisins
maraschino cherries!

This will make enough for 13 adults and 5 children ages 4-7ish.

The only ingredients that are really critical are the rice and the sweet bean filling. The important thing is that you end up with 8 fruits, nuts, etc to decorate the rice with. Maraschino cherries had a decidedly exotic and luxurious mystique to me as a child, and they remain my favorite no matter how horrible I know they are. Other traditional things are lotus seeds, chinese red dates, dried apricots, and maybe dried pineapple or candied chinese plums. I also used a few blanched almonds, but that was because I was really leery of the ginko nuts. See note below.

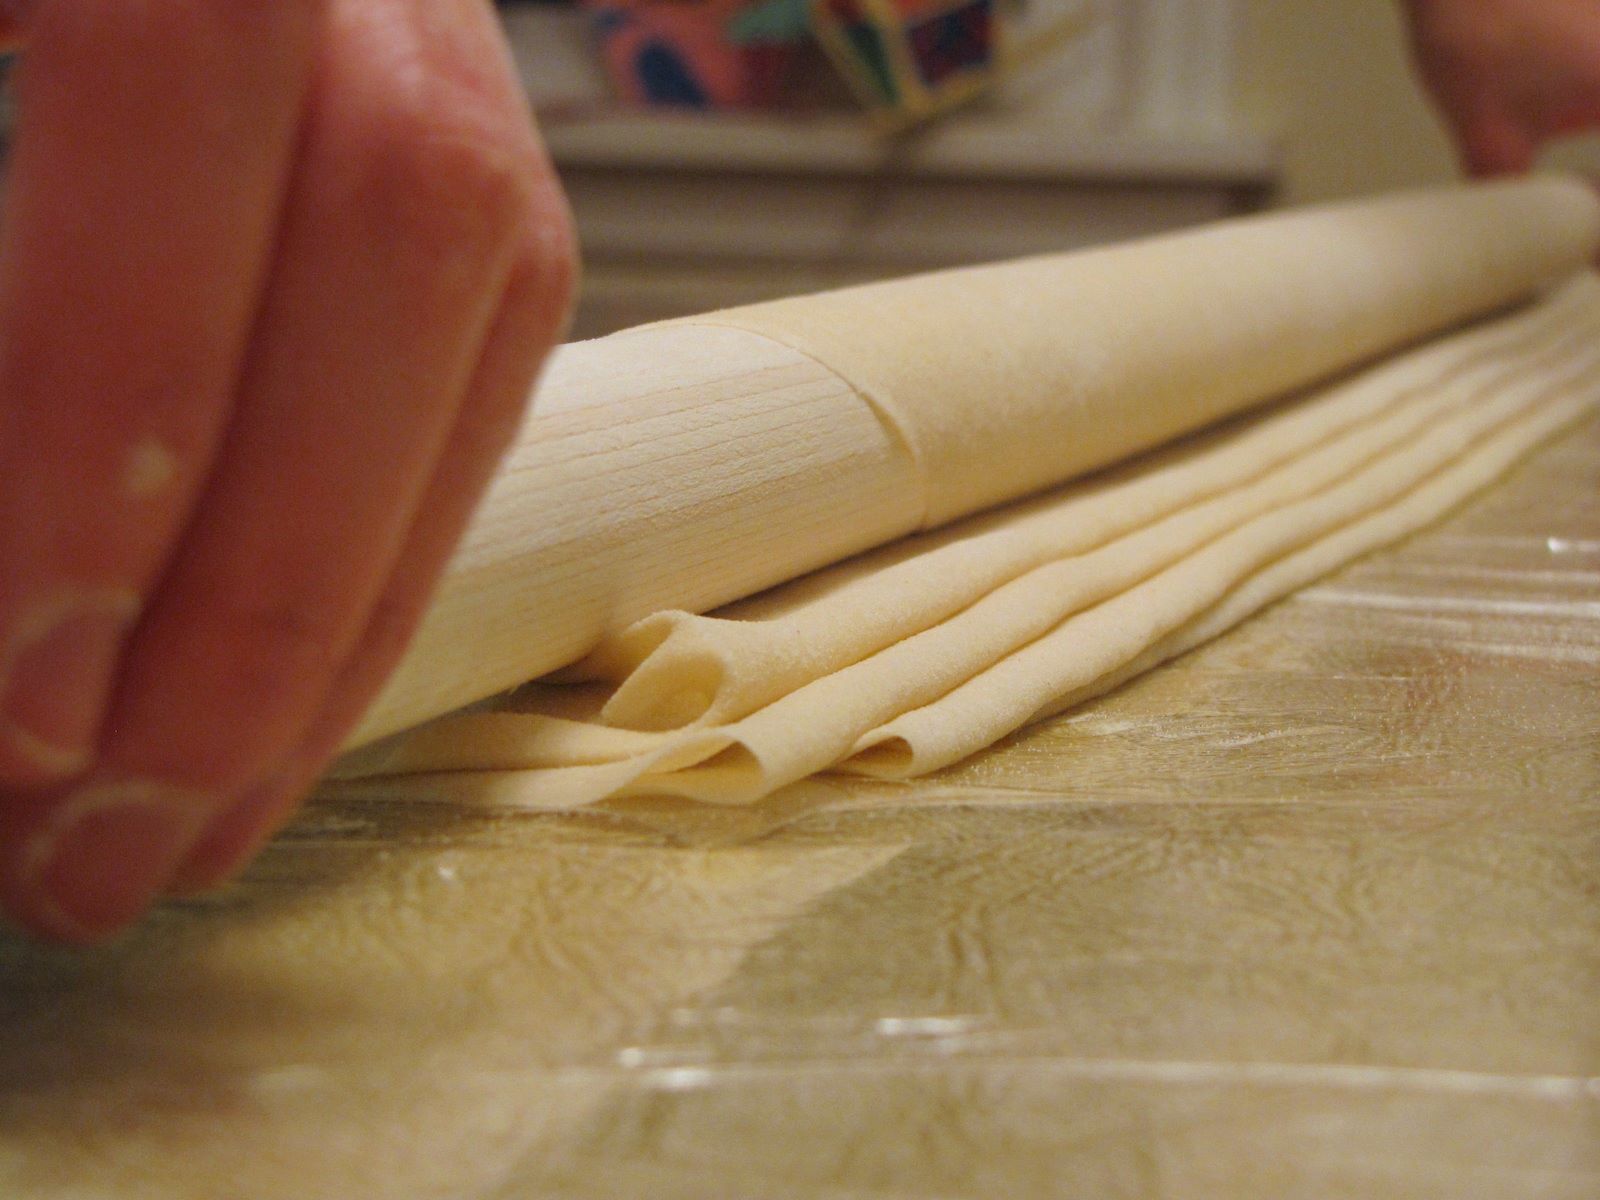
Rinse the rice 3 or 4 times, until most of the excess starch has been washed off. You could skip this step, if you wanted, but the rice is much easier to handle later if it's been well rinsed. Drain the rice, put it in a rice cooker with 4 cups of water, and cook as usual. When the rice is done, gently toss the oil or fat into the rice with a fork. Let the rice cool a bit while you assemble the rest of the stuff.

You will need a large metal or glass mixing bowl for a mold. Round is traditional, but there is nothing I can think of that should stop you from using a ring mold, a loaf pan, or any other fancy shape you like. The limiting factor is the fact that you have to steam the mold for an hour or two, so whatever you use has got to fit inside another, larger, pot with a lid. I had to borrow my brother-in-law's 5 gallon pressure cooker for this one.


Oil the mold. Arrange the rest of the ingredients in fancy designs in the bowl. Cover them with a layer of rice. I scooped up handfuls and patted it into flat pieces then laid them on top of the decorations. Keep your hands wet while handling the rice, it will stick to you less. Scoop the bean filling into the middle, smooth it out, and cover it with a layer of rice. Gently press the whole thing down and cover it with foil.


I don't have 3 arms. My niece Agatha was helping me with the almonds.

If you mean to eat it more or less immediately, steam it for about an hour- all it needs is to be hot through. If you're making it ahead of time, like I did, refrigerate it until about 2 hours before you want to eat it, then steam it for about 1 1/2 -1 3/4 hours. That much mass will take a while to warm up. About 15 minutes before serving, remove it from the steamer and run a knife around the edge to loosen it up, then invert it onto a serving dish. If it doesn't immediately fall onto the plate, just go away and leave it alone for a few minutes. Presently, the steam trapped in the mold will un-stick the rice, and it will come out. Pick off any little bits of decorations that are still in the mold, and put them back on the pudding. Serve with a little honey drizzled over each person's portion.

Note: Ginko nuts (or seeds) can be found in little vacuum packs in the refrigerated produce section of Fubonn. To prepare them, mix 1/4 cup sugar with 1/4 cup water in a small sauce pan and simmer until the sugar has dissolved. Put in the seeds and simmer them for about half an hour befor using them. They are very strange. They are slightly astringent tasting, sort of like pine nuts, and once cooked in the syrup, they have a texture like gumdrops.

Ginko nuts figure largely in the early lore of my family. Some time while I was in grade school, Dad took Pete to help gather ginko nuts. If you've ever walked under a ginko tree in the fall, you will have noticed that fallen ginko fruits smell like poo. That's because, like actual excrement (and body odor, and rancid butter), ginko fruit contains butyric acid, which is known as one of the stinkiest chemicals in the world. So of course, chinese people love to eat ginko nuts. They are even slightly poisonous! Besides, why would anybody be put off by the idea of coming home smelling like a pigsty, leaving your (only) pair of sneakers and the inside of the car scented like a cesspool from the contents of a 5 gallon bucket of decaying fruit? All you have to do is wash the foul-smelling glop off the outside of the seeds... which involves plunging your arm into the bucket and sloshing them around.

No, thank you. I will buy little vacuum packs in the grocery store.

Thursday, December 30, 2010

Brussels Sprouts Breakfast


Sometimes, the idea of a good breakfast is the only thing that gets me out of bed in the winter. I've discussed the peculiar virtue of breakfast many times already, so I'll just say that this iteration did it's magic especially well. For those of you who do not feel that brassicas at breakfast have any appeal, I encourage you to have eggs and grilled sprouts for dinner.

The last time I bought brussels sprouts, I got a huge branch of them at TJ's and it was more than I needed at the time. So I cooked them and froze them. I've had bad luck with frozen sprouts before, and I was a bit anxious about doing that, but they defrosted just fine. The key difference I think, is that before I had used sprouts that had been frozen fresh, which caused their cooking behavior to be a trifle unsatisfactory. This time I fully prepared my sprouts and then froze them, and they thawed out perfectly. Here's what I did:

Rinse and halve 2 pounds of brussels sprouts and put them in a microwaveable dish with a lid. Put 3 or 4 tablespoons of water in the dish to create steam, add a fair amount of butter, salt and pepper, and microwave in 3 minute increments until they're done. After about 6 minutes, stir in about 1/2 teaspoon of pumpkin pie spice, which is mostly nutmeg, ginger, gloves and maybe cinnamon. 'Done' is a matter of taste. Early in the season when sprouts tend to be very tender and mild tasting, I only cook them until they're bright green and slightly translucent. Later on, they tend to be tougher and more bitter, and I like to cook them until they are very soft and are a more olive green color. These were some of the latter. If you freeze them, they may take a few days to thaw in the fridge.

This morning I remembered that I had cremini mushrooms. I grilled some of those in butter, then browned the sprouts in the pan. When the sprouts looked good, I scrambled up some eggs to go with- a few of my sprouts and shrooms got into the eggs, but that's fine. The trick with mushrooms is not to stir them around when they're browning, or they'll get sorta squishy. Just put plenty of butter in the pan, get it medium hot, put in the shrooms, and leave them alone. Once you can see them curling up, flip them over once and do the other side.

Does anybody but me feel that it's totally fancier to have two different kinds of jam for your toast?

Wednesday, December 15, 2010

Green Beans


Green beans are really only appealing when they are cooked in one of 2 ways: either barely blanched enough to make them go bright green and then shocked in cold water to stop the cooking, or really, REALLY cooked. This is one option for the latter. Interesting cultural side note: hillbillies in Floyd County, Virginia, and hillbillies in Shandong Province, China, cook their green beans in exactly the same way. Here's how they do it-

Get a mess of green beans, an onion, and a good sized bit of bacon. Cut up the bacon and onions, put them in a pot with the beans and enough water to about half-cover the lot. Bring the pot to a boil. Cover it, reduce it to a simmer and add a few pinches of salt. If you want, you can put in a little bit of pepper. Stir it every once in a while, but mostly just leave the pot to simmer until the beans have nearly dried out, and you can almost hear them sizzling on the bottom of the pot. Take them off the heat, leave them to cool for a minute then stir them once to get the flavors well mixed and to take up any brown bits from the pan.

Practical notes: Use really good bacon. I used 2 slices of TJ's to about a pound of beans. Also, taste for salt after about half an hour, they take a good bit. It encourages Maillard reactions. They should take around an hour to cook.

Beans cooked this long develop nutty, roasty flavors that go really well with the smoky and meaty flavor of the bacon, but they retain their characteristic 'beany' taste as well. Also, long cooking makes them very tender, which is enhanced by the bacon fat. They are quite buttery, a satisfying thing to eat in the winter.

If you live in Floyd, you can eat them with biscuits, or rolls, cornbread, mashed potatoes, homemade pickles, and pork chops or chicken if you are at all reasonably prosperous. If you live in Shandong,  you can eat them with rolls, possibly  boiled potatoes, homemade pickles, and pork chops if you can afford it. But if you haven't got any of those things on hand, don't let that stop you from eating green beans. Really, there isn't anything they don't go with. I get creeped out by cooking raw meat in my own apartment, (the packaging is nasty) so I ate mine with a cup of tea and some gingerbread.

Monday, December 13, 2010

Special Dethklok episode


I made a gingerbread house. Most of youse have already seen it. But I am really pretty geeked about the thing, or maybe it's just sugar overload. I hadn't planned on eating it, but the gingerbread is actually so scrumptious that I think it won't last until Christmas. Thanks again to Susan, for hosting a Most Excellent get-together, and the rest of the ladies present, Alaina and Jess and Natalie, for conviviality and silly-ass shit. For the record, whichever recipe made the light-colored, rather soft gingerbread is my favorite, and I want to know what it was. I can hear the roof of my spooky little cookie shack caving in as I type, but who cares? I can't eat it whole.

I took lots of pictures when I got home, and they're up on my flickr photostream, along with a bunch of other things, including a couple extra pictures of Thanksgiving.

If anybody else out there is considering hosting a similar event, my advice is twofold: 1) Dollar Tree, 2) Bacon.

Saturday, December 11, 2010

Eldoris Dyer's Pineapple Casserole


The handwritten instructions I received for this are somewhat imprecise.


But then, so was the man who wrote them out for me. A dear fellow, but...

At any rate, this shit's good. Here's a slightly altered ingredient list & procedure:

3/4 cup butter- I used salted, since the recipe does not call for added salt.
6 eggs
1 cup sugar (!)
a 20 oz can of crushed pineapple- see below
8 slices white bread

Pre-heat  the oven to 375.

Melt the butter. Hold the 8 slices of white bread together in a brick, and generously butter the crusts. Then carefully saw the crusts off with a bread knife. Tear the bread middles into 1-inch chunks or so and put them in an 11" casserole dish. Reserve the crusts for the top.

Thoroughly combine the eggs & sugar in a large-ish mixing bowl. I put in a dash of vanilla, even though it isn't in the recipe. Can't leave well enough alone. Mix in the pineapple and melted butter and carefully pour over the bread chunks. Push everything down until it's in an even layer in the pan, then lay the crust bits over it. Sprinkle a fair amount if sugar over the crusts. Bake at 375 for about 45 minutes.

Notes-

1. I think actually following the recipe regarding the pineapple is probably best. I didn't have crushed pineapple in my cupboard, I just wanted to use up the can of pineapple rings I had bought on impulse a few months ago. So I stuck the rings in the mini-prep, and used about 3/4 of the juice remaining in the can. A can of crushed would have both been easier and netted more actual pineapple in the dish.

2.The crust thing is not half as OCD as it looks. Once you butter the bread brick, the crusts will have a tendency to come off all stuck together.

3. My eggs were cold. If they were room temperature, I bet it would cook lots faster.

4. Yup, that's a lot of sugar. Put it in anyway.

5. This may be important- I didn't actually assemble the thing as stated above- I mixed the bread in with the liquids in the bowl, then dumped it into the casserole dish. I think the procedure I've written out would be better because I had forgotten that genuine, store-bought, white bread will instantly disintegrate on contact with moisture. There would be a greater semblance of texture to the finished product, I think, if the liquid were just poured over the bread.

Man, it was hard not to dink around with this recipe. I wanted to put in bits of candied ginger, I wanted to top it with grated palm sugar, I wanted to make it with bacon drippings, all kinds of kooky notions went through my head. And then I decided not to. I figured that its authentic, 50's-era, white-people-food quality should stand on its own. If it was good enough for Eldoris Dyer to pass down to her grandson, then damnit, it oughtta be good enough for anybody. But I do wish I'd gone back over to Pete's to swipe a can of maraschino cherries out of his fridge. It'd look fancy.

Tuesday, December 7, 2010

Noooodles!


They need that many o's because they are extra long. Also because I had extra fun making them. Pete got the pre-turkeyday video he shot edited up, and it is now on youtube. Unfortunately, I don't have any still shots of this yet, but I'll link to any Pete puts up, they're all on his camera.

Dec 15th- Now with more pictures! Yay!

The recipe for this is very approximate. It goes something like this: Take about a cup and a half of water, and a half teaspoon of salt, and a tablespoon of oil, and put them in a mixing bowl, or do what I did and use your bread machine. Start mixing in bread flour. Keep adding flour gradually until the dough pretty much doesn't want to accept any more flour. Knead it until it's smooth, then put it in tupperware and leave it to sit on the counter overnight. In the morning, poke the dough. If it feels pretty sticky, turn it out and knead in about another 1/4 cup of flour. Knead it as smooth as you can get it, then put it back in its airtight box for at least 8 hours. You don't have to use bread flour, Dad never did. That's just what I always have most of.


Here's the video. It shows what to do with the dough. I have some things to say about it: WOW do I sound dorky...please ignore the audio, it is entirely irrelevant. Also, it has been edited down a great deal, because rolling a glob of dough 25 times or something is very boring to watch. Dad had a 5 or 6 foot piece of plywood set up on legs in the basement for doing this; we wrapped the dining room table with cling film. The thing I'm using to roll it out with is a dowel pete got at Fred Meyer. For true authenticity, you should saw the handle off a shop broom, sand most of the paint away and use it. Yes, Dad did do that.

On a more practical note-

1. Sprinkle on lots of flour in between rollings, or the dough will stick to itself. The expansion of the dough is caused primarily by pushing the dough out towards the ends of the dowel as you roll, rather than by squashing downwards.

2. It would be better to leave the dough for longer than 8 hours in the second resting period if at all possible. You can't see it well in the video, but my dough had a strong desire to shrink back up. If you leave it longer than overnight, refrigerate it so it doesn't ferment. I seem to remember there being noodle and potsticker dough resting for days at a time in the fridge when I was a kid.

3. The dough is slightly less than 1/16th" thick when it's done. Try to cut them no wider than 1/4".


4. That oil is HOT! Be careful of the steam! Don't drop the noodles in from a great height, or you will splash boiling oil on you! Get close to the oil surface, release the noodles, and get your hand out of the way. Yes it is rather dangerous, that's why I made my brother do it.


5. They will cook in less than 15 seconds. The wire strainer thing is for corralling the noodles into a disk as they crisp up, as well as for getting them out at the end.

Incidentally, chow mein was not the primary use for these noodles when we were kids, or at least, not how they were eaten by just our family. Dad did his crazy illegal catering thing, and people had him make chow mein for that, but usually the reason he made noodles for us was birthdays. Instead of frying them, he boiled them like any other fresh pasta, and put on a very salty sauce made with soy sauce, hoisin, ham bits, green onions, sesame, and garlic. These were 'chang sho mein', that is, long life noodles. The length of the noodles is supposed to be auspicious, and the correct protocol is to slurp them up without biting them to pieces.

Addendum: We had breakfast with my chinese cousins this weekend. Henry said that I roll noodles just like my grandmother. This was astonishing to me, since I have no memory of her ever doing it, except maybe one time when she rolled the dough around the pin about one time to show that she still remembered how. I'm not sure that's a true memory, since I would have been very small. It seems that she taught my dad how to do it. And all this time, I just figured dad learned from some disreputable roadside noodle vendor in Shandong back in the dark ages.

 Ah, there had been *ahem* some drinking involved...