Saturday, September 17, 2011

Lemon Dilemma


Because I am a single gal, I usually don't use a whole lemon before it gets all wizened into a rock. I solved that problem by keeping lemon wedges in the freezer, but one consequence of freezing lemons is that when you thaw them out, the lemon oil in the rind tends to make your food bitter.

The lemon zest is where most of the oil in the rind is- which is a good thing if you want a pinch of it minced up to flavor something with. Not so good when you microwave a frozen lemon and you can't control how much peel flavor goes into your lemon juice. I decided that was something I could live with if it meant that I could have fresh tasting lemon juice without wasting most of a lemon, until I read somewhere that you can preserve lemon zest in salt or sugar. Hmmmm. If I zipped all the outsides of my lemons off before freezing them, I would have solved the bitter-lemon problem, as well as saved the good parts of the rind for something else, right? So the last time I bought half a dozen lemons, I saved the zest in a pint jar of sugar.

Well, now I have 2 cups of lemon sugar to use up. No big deal, but who on earth actually uses as much lemon zest as that? Next time, I think I'll just freeze some of it separately and make myself throw the rest away, like a sensible person. Meanwhile, here are some lemon bars.

2 cups all-purpose flour
1/2 cup powdered sugar
3/4 cup butter -I use salted. If you don't, then add 1/4 tsp salt to the crust.

5 eggs
3/4 cup lemon juice
1 1/2 cups sugar- I used 1 cup plain, 1/2 cup lemon sugar.
1 tsp baking powder
1/4 cup flour
1/4 tsp salt

Pre-heat the oven to 350. Line the bottom of a 9x13 pan with waxed or parchment paper.

Cut the first 3 ingredients together with a pastry tool. Unlike normal pastry, you don't want to leave butter lumps in the dough. It's done when it looks almost moist, but still crumbles easily. Dump the crumbs into the pan, distribute them evenly over the bottom, and then press them down firmly into a nice solid crust. Prick the crust all over with a fork to prevent it from bubbling up in the oven, and bake it for about 13 minutes. It should be barely browned around the edges by that time. Remove the crust from the oven, and turn the heat up to 375.

Beat all the rest of the ingredients together until completely combined. Pour over the crust, and bake for 15-20 minutes, or until the filling has set. When they are cool, sprinkle the tops with powdered sugar and cut them up. 

Notes:

1. While the bars are still hot, take a very sharp, thin, knife and run it around the edge of the pan to separate the bars from the baking dish. On a related note,

2. Don't be tempted to use a non-stick pan. Even if the bars don't stick to the sides of the pan, you still have to cut them up, which will just gouge holes in your teflon. I am against teflon anyway.

3. You really do have to wait until they are cool to put the powdered sugar on top. If they are still warm, the steam coming off the bars will just make the sugar dissolve. I think Harriet did that once. They still tasted fine, but they didn't look the same and the tops were pretty sticky.

4. The amount of time the filling will take to set up depends on how cold your ingredients are. I use eggs right out of the fridge, so they take on the long side to cook.

5. Oil the knife you use to cut them with. This part isn't mandatory, but it makes them come out prettier, because they stick to the blade less.

This is a pretty good formula. It makes a good sized batch, with a nice proportion of lemon stuff to crust. I looked up a bunch of recipes before I made these, and I think I incorporated the main features that attracted me to each. I used less total sugar than most recipes called for, and more lemon juice. I added an egg to compensate for the extra juice, which had the added benefit of increasing the total volume of lemon goop to slightly greater than 50% of the finished confection. There is just enough flour in the filling to give it some stability, and the baking powder adds a bit of fluff.

The powdered sugar in the crust is indispensable for creating the texture which is such a key part of the lemon bar mystique. Granulated sugar tends to make a tougher pastry, both because the larger particle size makes the sugar distribute differently in the dough, and because powdered sugar has quite a bit of cornstarch in it as an anti-caking agent. I'm pretty sure that it's mostly the cornstarch which makes the crust both tender and dense, as a lot of shortbread recipes call for it. Incidentally, if you measure ingredients by weight, this takes about 65 grams of powdered sugar in the crust.

Saturday, September 10, 2011

Bobbin Lace


I got a new obsessive hobby. I can never have too many of those, because knitting and sewing weren't enough, apparently. This does make some very pretty stuff, although I doubt I will ever become an expert lacemaker, any more than I am an expert knitter.

Bobbin lace has always fascinated me, initially because it is so pretty. Then when I read a few things about how lace is made, I was amazed by how simple the basic mechanics of lacemaking are. No matter how fancy a piece of lace looks, it is always made by doing one of the following things:

Take 2 strings. Either cross the left one over the top of the right one, or

Cross the right one over top of the left one.

If you line up a whole lot of strings and cross them left over right or right over left repeatedly, you will have lace. It's just like making a rather wide braid with tiny threads instead of large cords.

So, how do you know what order to do it in? Well, you draw a little map on a strip of paper, which shows you where your strings go, and pin your lace to it as you go along. How do you know where to put in a pin? You draw a little dot on the map, of course.


The cool thing is that, to an extent, you don't need to do the parts in any particular order. As long as you cross to the left or the right in the correct sequence, it will turn out fine. Sure, you can get pretty obsessive, and it's true that the more methodical you are, the fancier a thing you can make, but the pictures are of a super easy beginner's pattern I found online, and I think it's awfully nice.

Monday, September 5, 2011

Blueberries, Cashews, Vinaigrette


At some point, it finally got warm enough for me to be interested in eating greens. I've never met a store-bought salad dressing which I liked enough that I thought I would consume a whole container of it before it went bad. They're usually gooey, or slimy, or intensely sweet, or all of the above. Even the better kinds are just sort of Ok. No big surprise there- by definition they are designed for the mass market, and for a degree of shelf-stability undesirable in a home made food.  Most of the time I just dash some balsamic vinegar and olive oil on my salad and call it good. Unfortunately, this can get a bit monotonous. Here's something zippier:

Sesame Ginger Vinaigrette

2 tablespoons fresh ginger, grated very fine
1 small clove garlic, also grated very fine
1 teaspoon brown sugar
1/4 cup light soy sauce
1/3 cup rice wine vinegar
2 tablespoons sesame oil
2 tablespoons olive oil

I find that keeping my ginger root frozen makes it grate better, but that's the closest this recipe gets to food-ninja technique. I keep the dressing in the fridge and slop it on greens, or chunks of tofu. It's pretty good on rice too. You have to be a bit careful though because it'll give you garlic mouth somthin' powerful.

My salad hasn't got anything particularly Asian about it, but the dressing reminds me of the stuff that comes on salads in Japanese restaurants. I tried this with raisins and pine nuts, but I think I like the blueberries better. They almost have a citrusy thing which does well with the garlic and sesame. I could go either way on cashews vs. pine nuts, but visually, the cashews are more interesting.

Sunday, August 28, 2011

The possibilities of peas


I first made this with chick peas. I still like it with chick peas, but I recently started using blackeyed peas for a bunch of different things. They taste more interesting than most other types of beans, also, a) I don't use up a whole can of refried beans before they go bad and b) a can of most any type of beans costs about a buck, while a pound of dried peas costs about 75 cents. I can make as many or as few as I need, and I find they don't seem to need as long a cooking time as other dried beans- probably because they're very small, but probably also because I do pre-soak them. This used to bother me- it seemed like fiddly sort of thing to do. But then I realized that leaving them in a tupperware of water in the fridge over night, or the next night, and frequently the night after that until I decide that yes, today is the day I want them actually realizes a net reduction of fiddle. There are a couple things I've found that are good to do before you put them on the stove:

1. Shake them up and then rinse them well. Gets rid of more indigestible carbohydrates. Makes you more polite to your companions later.
2. Season them! Duh right? Not really. Cooking the seasonings in rather than cooking then seasoning makes a huge difference.

If I know I want to make refried beans with them, I put in salt, a bay leaf, pepper, cumin and a good shake each of onion and garlic powder. Yes, fresh is good, but this is refritos, people. You're just going to cook the bajeebus out of 'em, so it don't make a difference. Less fiddle! If I don't know what I'm going to do with them, I just add salt and a bay leaf. That's what I have in the picture here.

Along with the blackeyed peas, I have a tomato, some lentils (I like the kind called 'green french lentils' because they seem to hold their shape well), some kalamata olives, a few fresh mint leaves and some cumin, ground coriander seed, and a dash each of olive oil and the olive brine. I usually like to put in a yellow bell pepper for color, and if you want more green stuff, the recipe originally called for flat leaf parsley rather than mint, but I didn't have those things today. As I said, the first version of this had chickpeas in it, which make the salad taste nuttier. Blackeyed peas have a grassier taste which is rather nice with the coriander and mint.

But what else do I do with them? In the winter of course, I cook them with bacon. They are pretty tasty as an ingredient in other salads, and sometimes I get lazy and rather than bother to smash them into refried beans, I just sprinkle them on my nachos before they go under the broiler. I have a recipe for black bean and sweet corn fritters, which I want to use with blackeyed peas. They're good with migas, too.

Incidentally, does anybody know where I can get some pigeon peas?

Friday, July 29, 2011

Eeek-A-Spider!


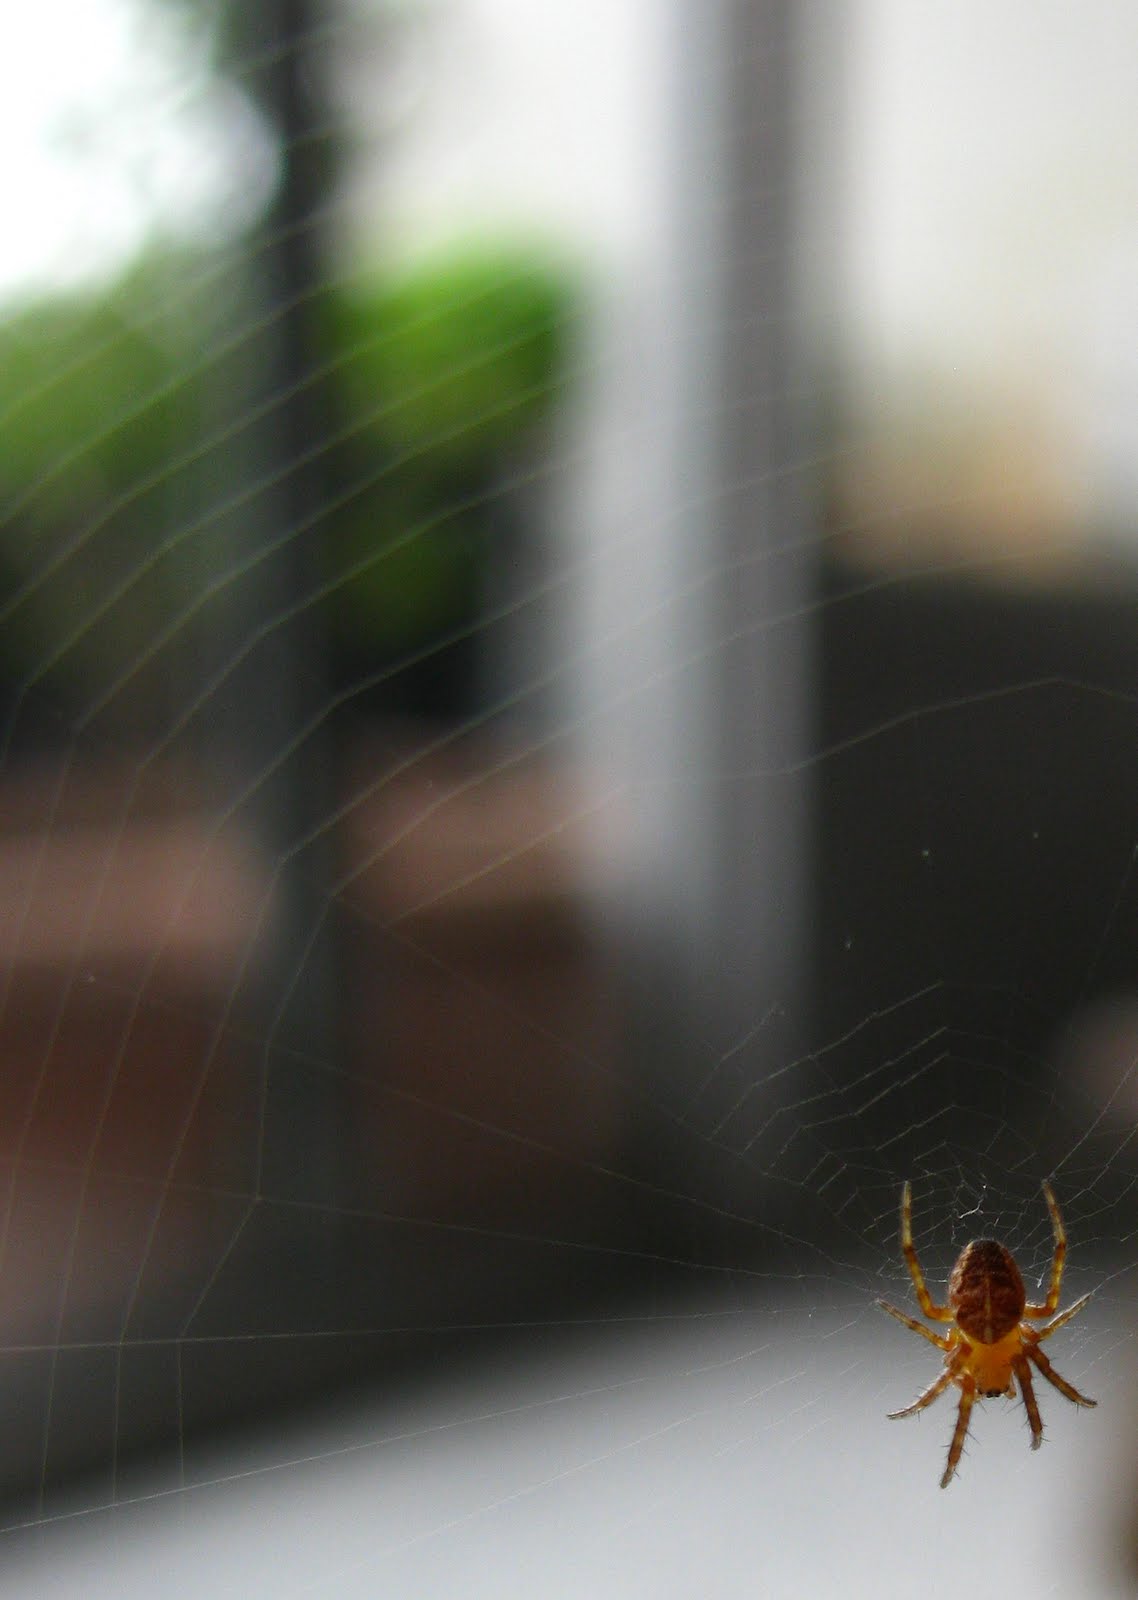
I sat down on the couch with my breakfast and saw this beastie hovering in the air between the screen door and my cutting table. There are lots of them on the porch messing around in my flower pots; this one must have gotten blown into the living room yesterday some time. What baffles me is how it got its web strung up to begin with. That would  be like me hanging a clothes line between the sides of Columbia Gorge. The sneaky little critters do it at night, so I never see how they start.

I had to put it outside. I felt a little bad about tearing down its web. I wasn't sorry for the spider, I mean, they build at least one every day, but I was a bit enchanted by the oddity of having such an ethereally perfect thing decorating my house.

Sunday, July 17, 2011

Yay Baguette Pan!


I found a baguette pan at goodwill! I saw one about 2 years ago, and had been kicking myself ever since for not buying it. But now I have one, and in my excitement, I had to go look up some recipes for baguette making. I used the smaller formula found here, but I didn't really follow the procedure exactly. Here's what I did:

 for the pre-ferment

100g bread flour
100g water
1/2 teaspoon instant yeast

Mix these things together until they are pretty smooth. Cover loosely, and allow to sit at room temperature for 2 to 4 hours. Then either stick it in the fridge until you want to use it, (for me, that was from Friday night until Sunday morning) or start making the bread with it right away.

In either case, add

325g bread flour
155g water
1 1/2 teaspoons salt
1 teaspoon instant yeast

Knead until it's pretty smooth, around 10 minutes, then cover and allow it to rest for 40 min. Fold the dough over on itself 3-4 times, let rest another 40. Do the folds again, and another half hour rest.

After the final rest, gently shape the dough out into a log about 14" long. Cut it in half along the long axis (I used a chef's knife). This will give you 2 long skinny ropes of dough. Pinch the cut edges closed on each one.

Lightly oil the pan, and place each rope of dough in one of the depressions, with the pinched parts facing down.. Cover with a towel and let it rest 10 or 15 minutes.

Brush each baguette with a little water, then slash the tops with a knife.

Bake at 450 for 15 min, then turn the pan and reduce the heat to 375. Bake another 15 minutes.

notes-

1. Measuring ingredients by weight helps a lot. Water is the same size all the time, so you can measure it by volume if you like, but because flour is a compressible powder, a cup of it can contain vastly different actual amounts of stuff. Measuring with a scale eliminates the problem, because a pound of flour is always a pound of flour, no matter how much room it takes up.
2. I used a bread machine. I just set it on the knead cycle for 10 minutes, then took the dough out and put it in a bowl for the resting & folding parts.
3. Today it's pretty cool in my house. I did the rising in the oven, with a kettle of boiled water next to the dough to keep it warm.
4. You shouldn't need to add any more flour for the folding part, and only the lightest dusting on the board for the shaping. Adding a bunch more flour will make the bread heavy and dry.
5. The amount of time it takes to pre-heat my oven is about the right amount of time for the final resting of the dough in the pans. I have an electric oven, so it takes a while.
6. Don't be afraid to really slash the loaves! I did not do mine quite deeply enough, and as a consequence, the loaves split longitudinally, rather than having those picturesque eyes open in the tops.

Man these are great. They also are a giant leap forward in my bread making skills. The pan helps, but I think mostly the procedure is what matters.

There are a couple things about this recipe that seem to be important. One is probably salt. This calls for almost twice what I usually put in my bread. Salt does something to the way yeast metabolizes the flour, but I'm afraid I don't know exactly what. Obviously it also affects taste: this is a very savory loaf, deliciously so.

The other thing is the pre-fermentation of a portion of the dough. Longer rising will times let the yeasts develop more 'bready' rather than 'doughy' flavors in the finished loaf, but letting it go too long will make the dough have a strong alcoholic whiff. That fades quickly, but it still isn't what I want. Rising time also affects texture- long rising gives the best breads a chewy texture, but has a tendency to make them dense and rubbery also. Short rising gives bread a lighter, more delicate texture, but will impart less flavor. The compromise is to pre-ferment only part of the dough. Outcome? Crusty, yet tender,chewy but light, complex taste and freshness together.

Now, how could I have gone and failed to provide myself with some nice runny cheese to go with this? Foolishness! On the other hand, if I had, I would never have realized that a slice of cheddar with a couple nasturtium leaves is a lot like cream cheese and watercress, but with more oomph.

Wednesday, July 13, 2011

Banana Cake


I had a jones, of no origin, for banana cake. I googled 'banana cake recipe', and chose the one that said "best ever banana cake recipe", of course. I wasn't going by the title alone, the recipe had 900 reviews and counting, which were overwhelmingly positive. Either it's a foolproof cake, or somebody has waaaaay too much time on their hands to write nearly a thousand spurious recipe reviews. I'm betting on largely foolproof. After my misadventures in baking recently, I did a little technical research on the behavior of cake, which I put in the notes at the bottom.

Of course, I couldn't possibly make myself follow the recipe. The original calls for buttermilk and lemon juice. The buttermilk I didn't have, so I swapped in an equal amount of greek yogurt, and the lemon juice is presumably just to keep the bananas from going brown. It was already too late on the browning prevention, so I left it out.

3 medium-large, very ripe bananas
3 cups AP flour
1 1/2 tsp baking soda
1/4 tsp salt
2 cups sugar
3/4 cup butter
3 eggs
2 tsp vanilla
1/2 cup greek yogurt

Preheat oven to 300.

Butter and flour an 11x15 cake pan.

Cream the butter, sugar, eggs and vanilla together. I used my food processor. Mix in the yogurt.

Sift in half the dry ingredients and mix into the batter.

Puree the bananas and pour half into the batter. Mix in the bananas, then do the rest of the flour, then the bananas.

When everything is thoroughly mixed and there are no streaks or bumps, pour the batter into the pan and spread it out evenly.

The side bar on the recipe said that the cooking temps might be anywhere between 275 and 325, and the time somewhere between an hour and 1 1/2 hours. The lack of specificity made me a little anxious, especially since I have had poor luck with my baking lately. I ended up with 1 hr 15 min at 300.

Strawberry Cream Cheese Frosting  

1 packet cream cheese
1 stick butter
2 teaspoons vanilla
2 or 3 tablespoons water
3 cups powdered sugar
1 packet trader joe's freeze-dried strawberries

Mix all the frosting ingredients except strawberries until you have achieved a smooth consistency, somewhere around that of very soft peanut butter. Put the strawberries in a food processor and process until they have turned into a fine powder. Make sure the bowl of the machine is perfectly dry, or the berries will turn into glue. Reserve half the frosting, and mix the berry powder into the other half to make a pink and white cake.

Some notes:

-I lined the bottom of my cake pan with waxed paper. It really helps get the cake out. Butter the pan, cut a piece of paper to fit, press it into the bottom, butter the paper, then sprinkle everything with flour. Tap the excess flour out before putting in the batter.

-I had my heart set on a cake with layers, and was a little worried that the cake would come out with a large bump in the middle of the pan, making it unsuitable for cutting and stacking. I needn't have worried, as it turns out. The low cooking temperature seems to result in a very even rise in the cake.

-Make sure the cake is completely cool before trying to frost it. I made the cake one day, covered it and put it in the fridge, then frosted it the next day. I obviously don't have a very skilled frosting technique, but here is what the experts say- 1) Stack your layers, then trim the edges to make a perfectly geometric cake. 2) Spread a thin layer of frosting over the raw edges, then wait for about 5 minutes for it to set up. This will glue down the crumbs, then you can put a thicker, nicer-looking layer on top.

-What's it mean when they say "cream the butter and sugar", anyway? Well, what they mean, apparently, is that the butter & sugar should be beaten together until the sugar dissolves, and there are enough microscopic air bubbles thrashed into it, that the mixture appears to have gotten paler than it was before. I think I got that part right, thanks to modern technology. Recipes usually don't say to add the eggs at this point, but I did it anyway, because as I understand it, the important points are 1) dissolve the sugar and, probably more importantly, 2) create those tiny bubbles in the batter. Yes there is a leavening agent (baking soda), but the tiny air pockets are a key factor in creating a light, fluffy, cake. In the oven, the heat causes the tiny bubbles to expand, and then the batter sets up around the air pockets. Unlike cookies or brownies, which are dense, crunchy or gooey as the recipe calls for, in cake the trapped air bubbles result in a food item composed largely of air.


Setting aside the fact that my decorating job looks like it was applied by a 3rd-grader, I'm fairly pleased with the result. It's really a cake. It has layers, with frosting, and it's pink, my favorite flavor. And boy is it banana-ey! I had a hard time convincing myself not to eat it for breakfast today.

Sunday, July 10, 2011

Finally finished projects


 I've been toting around this fabric for years and years. Several months ago, I picked up some patterns at the goodwill bins, and this one looked like it would be nice in this material:


So I made a shirt. It turned out pretty well, and I really liked how easily the material sewed  up.


Then, when mom sent out a bunch of her vintage patterns, one of them inspired me to use this material again, to make the dress in the picture above.


Here's the picture of the pattern. I didn't think much of the sleeves given with the pattern, so I chose some different ones, which is fine since the v-neck was what sold me on the idea in the first place.

It took me months to finish it. Partly that was because I ran out of zippers. Then I spent some time dithering about whether I wanted to use orange fabric to make a belt, or piping, or the ridiculous bow on the front. I still might make a belt, but maybe not.

What really hung me up was the fact that halfway through the process, I spent a huge chunk of time sewing buttons, snaps, zippers, bows, hooks and eyes back on a bale of things that mom sent me so that I could decide whether to use them myself (a few), give them to my nieces (rather more), or figure out if any vintage stores will take them (a couple bits). It all added up to a heap of not very interesting looking or sounding things, at the end of which, I found myself wondering what the heck I had been doing with myself for so long that would make me feel as though I'd been fully occupied and yet produce so little apparent result. In fact, there was plenty of result, but it's all invisible, except my shirt and my dress.

Friday, July 8, 2011

Probably not Gratin


I bought broccoli and cauliflower the other day, thinking that I was not eating enough vegetables. I like cauliflower naked pretty well, but raw broccoli is unpleasant to me- it's the texture. Sort of dry, and scrunchy, and then it falls apart into all these little bits that will poof out of your mouth if you aren't careful. Fortunately, I am happy to eat it cooked. Now that I'm a grown-up, the sulfurous stinkiness of cooked broccoli is not so repellant as it was when I was a kid, and cooking improves not only texture, but the ability of broccoli florets to accept flavoring agents. Like cheese.

1 1/2 cup broccoli florets
1cup cauliflower florets
1 medium onion, diced
1 clove crushed garlic
1 tsp fresh thyme
1tsp fresh oregano
1 head of fresh lavender buds
3 eggs
2 tablespoons cornmeal
1/3 cup water
a generous tablespoon of butter
1 cup grated cheese
salt and pepper

Preheat the oven to 350. Use a heavy oven safe skillet.

Mince the herbs. Beat the eggs, water, cornmeal and herbs in a bowl, and season with a little salt & pepper. Set it aside to let the cornmeal soak up some water.

Put a little butter or olive oil in the skillet, and saute the onions until they go transparent. Add the garlic and stir it around for about a minute, then add the florets and a dash of water to create steam and cover the pan. Stir it from time to time to keep it from over-browning, and when the cauliflower is tender, take it off the heat and let it cool down a bit.

Stir the cheese into the egg mix. Melt the butter and stir that in too, then pour the mix over the vegetables, and poke them around a bit to get the cheese evenly distributed. Bake for 20 minutes, the turn on the broiler, move the oven rack up and brown the top until you like the way it looks.

Thoughts:

While there is nothing fancy about this dish, and it is almost identical to the fritatta I made a while ago, I think I like this a little better. Again, it's all about texture. Cauliflower is more delicate than potatoes, and cooks faster, giving the finished product a lighter feel despite the added butter in the eggs. (You could probably skip the butter, but why?) I think the cornmeal may have something to do with it, but it's hard to say. I really just used it because I needed a binding agent and that's what I found in the cupboard. It did create a few crunchies around the edges, which was nice.

Almost any cheese would be good, I had cheddar. Visually, I like the orange cheese, but I think swiss or gruyere would taste more interesting.

Come to think of it, there is a fancy thing: the lavender. That's very important. Lavender has an astringent character which balances well with all the fat in the dish.

As I was cooking this, I couldn't figure out what it is that makes something 'au gratin' as opposed to any other thing made in the oven. So I looked it up, and apparently, to be au gratin the dish should have a crust baked onto it, preferably made of buttered breadcrumbs. There are no crumbs here, so this is not gratin, unless you take the secondary accepted definition of a baked dish with cheese, which cheese forms a browned crust on top. That makes most recipes for mac and cheese fall under one or the other of these definitions.

Elbows Au Gratin sounds revoltingly twee.
 

Monday, July 4, 2011

Albino Jello


Also known as panna cotta, for those who want to be fancy. It's surprisingly tasty, if you like "desserts that quiver", at any rate. I'm chinese, so that comes naturally to me.

1 quart half & half
1 cup heavy cream
1 cup water
1/3 cup sugar
2 teaspoons vanilla
1 and a half  to 2 packets of knox gelatin granules.
berries to serve with

Put the water in a small sauce pan and sprinkle in the gelatin. Stir it up and let it soak for about 10 minutes. Add the sugar and vanilla, and gently heat the mixture until the solids are completely dissolved, but do not boil it. Put the cream and half & half in a large bowl and stir in the sugar mix. You can either refrigerate the whole thing, or divide it into single servings, and chill it for at least 8 hours. Eat it with fresh berries. Real no brainer, huh?

If you want to put it in a fancy mold and have it keep its shape when you turn it out, go for the full 2 packets, or a little more, and chill it for 24 hours- gelatin takes that long to reach maximum setting power. I like it best when the texture is just firm enough to bounce in a spoon, and to serve it pleasantly cool rather than plumb cold. Vanilla is a subtle flavor and the smell/taste particles are more abundant closer to room temperature.

Sometimes I wonder why I like this stuff so much. It's very weird crap. It's got the taste and richness of vanilla ice cream, but has the texture of jello and it won't give you brain freeze.

This seems to be related to a number of milk-based desserts. If you were to add eggs, its ingredients would be almost identical to flan, creme brulee, and pastry cream. Taken as it is, anyone who has gone to church socials and family reunions in the midwest recognizes it as the plain white layer in a striped jello. If you've ever eaten that almond flavored dessert at a chinese restaurant then you've met its asian cousin, and yet, it seems to be very different from any of those things. The eggs in creme brulee, flan, and pastry cream result in a much heavier texture than panna cotta. The stripey jello version, with the cream sandwiched between layers of neon, looks like a chunk of lucite novelty jewelry from the sixties, and taste the way a product of the space age ought to: compellingly artificial. The chinese version in its best iterations is very light, not rich at all, and the almond flavor seems give it an almost palate cleansing effect. (At its worst, almond curd is a rubbery, watery, kludge of canned fruit cocktail and vaguely eau-de-toilette flavored agar bits.)

The texture is key, I think. Heat alters both the texture and flavor of the cream in cooked desserts, and agar, which is the traditional setting agent in almond curd, has a unique set of properties as well as a distinct, if subtle flavor. Gelatin gives panna cotta a delicate, silky quality which contrasts with the intensely rich flavor. There must be some happy alchemy between cow-products.