Monday, May 14, 2012

Ooo OO! I made bagels!


Start with the pizza dough formula, and add a heaping tablespoon of dark brown sugar. Knead it well and let it rise at room temperature for about an hour and a half, until the air will whoosh out of it when you poke it. Don't knead it, just deflate it.

Meanwhile, preheat the oven to 450 and bring one or two large pans of water to a boil. Start squeezing the air out of the dough the way you would if you had hand washed a cashmere sweater: firmly, working in one direction, with no twisting. You'll feel the air popping out like bubble wrap. The dough will work out into a long rope, and when it's about 3/4" thick, wrap the end around your hand and pinch/tear the dough into a loop.

Set them on a floured surface for about 10 minutes, then slip them into the boiling water. Don't crowd too many in a pan, they should float freely. Boil them for about 3 or 4 minutes, gently flipping them over from time to time. Fish them out by sticking a chopstick through their holes, arrange them on a greased cookie sheet and bake for 20 minutes.

You have no idea how exciting I find this. I am starting to feel like a real baker, not, you know, a person who shambles through recipes and then quietly eats the evidence later.

These are easy. They have to be, for me to get excited about them. There are several steps, but none of them are complicated. Here are some tips though:

1. Don't worry if the dough rings are lumpy. As they rise, they smooth out a lot. Dough does that.
2. Don't stretch the dough very much when making the rings, or the holes in the middles will close up. It's gotta have a hole to be a bagel.
3. Do put sprinkles on them. I used roasted garlic chips, poppy seeds, sesame seeds, and salt. I wish I'd had some caraway seed, but that can happen next time. Slop some seeds and stuff on them just before they go in the oven, they're quite sticky when they come out of the water.
4. Traditionally, bagels are small. This recipe makes about 10 bagels.
5. I put a light shake of coarse cornmeal on the pan. This helps to prevent sticking.


I was so geeked out about these that I immediately jumped on my new bicycle and went to the store for some stinky fish, cream cheese and capers. Ok, so partly I was looking for a reason to ride my new bike, but whatever.

Wednesday, May 2, 2012

Cheap Grub


Last year or so I was talking about how most green leafy vegetables come in strangely large units. Cabbage, napa, collards, that stuff. Kale seems to be the exception to the rule, at least lately. I go to Fred Meyer and they're asking a buck-fifty for like, 6 meager leaves. Pfffft! That's maybe a serving? Ridiculous. Back to Trader Joe's. A big bag of kale there is about $2, and it's ready to go in the pot when it gets home. This soup is unremarkable looking, but it's tasty as well as cheap, and you only need one big pot to cook it.

Kale and Sausage Soup with Lentils and Things

1 italian sausage link, mild or hot- about 1/4 lb
1 onion
1 clove garlic
6 or 8 mushrooms
2 tsp broth concentrate
2 T tomato paste
1/4 cup brown, black, or green lentils
water, of course
2 carrots
1/2 bag of kale
salt & pepper

Use a 4 or 5 quart sauce pan with a fairly heavy bottom. Heat about a tablespoon of oil in it, and put in the sausage to brown. Meanwhile, dice the onion & mushrooms. Add the onions and mushrooms to the pot and stir them around. As the onions brown, start cutting little bits off the sausage. This will make the sausage into unevenly sized lumps, from little tiny grains to maybe half-inch chunks. When the sausage is browned, crush in a clove of garlic. Fry the garlic just until it is barely browned then add about 6  cups of water, the tomato paste, broth concentrate, and the lentils. Stir until the tomato paste is dissolved, and bring to a boil. Turn the heat down to a simmer, cover, and leave it alone for about 45 minutes. Peel and chop the carrots, then add them and the kale to the pot. You may need to add a little more water, due to evaporation. Cover the pot again and cook for another 45 minutes or so, until the kale is tender. It takes a long time. Taste for salt and pepper, serve with a dollop of greek yogurt if you feel indulgent.

Notes:

1. Yes, this recipe takes at least a good 2 hours. It's soup. Proper soup often takes a long time to develop flavors.
2. You could just squeeze the guts out of the sausage link instead of dinking around with it in the pan. But I happened to want the extra texture from the bits of sausage casing. Kale is very assertive, it needs plenty of assertive, bumpy, things to go with it.
3. Kale also cooks down quite a lot. Let it wilt into the soup pretty well before adding any additional water during the second half of cooking, or you may get an inaccurate idea of how much water you need to put in.
4. This soup needs a good bit of salt. The long cooking time causes the vegetables to become quite sweet, and the tomato paste adds plenty of sugar also. If you don't salt it, it will be very disappointing.
5. Likewise, do not use sweet italian sausage. It usually has too much fennel, and will not give the peppery kick the soup needs.
6. Brown, green, and black lentils hold their shape well when they're boiled. If you just want to thicken the soup, use red lentils, which dissolve rapidly during cooking. I used green ones, incidentally.

You need some nice crusty rolls with this, I think.

Thursday, April 26, 2012

Bread and Eggs


Bread pudding is usually sweet. This is not. It makes a very good lunch.

stale bread- use about 2 cups, maybe a little more

3 oz grated cheese: gouda, cheddar, parmesan- use something nutty.

3 or 4 eggs
1 1/2 cups milk
salt
pepper
butter
1/2 teaspoon minced rosemary
pinch each of lavender flowers & nutmeg, finely grated
1 heaping tablespoon flour

I have a 6 cup casserole I like to use for this. Butter the bread lightly and cut it up into 2 inch pieces. Put the bread in the dish and add the cheese. Poke the cheese around so it is distributed evenly among the bread pieces. Mix all the other ingredients thoroughly and pour them over the bread and cheese. Let the bread soak up the liquid for 5 minutes or so, then bake at 350 for about 40 minutes. If it still has liquid spots on top at that point, turn the oven off and let it sit in there another 15 minutes.

Points to consider:

1. Use only very good bread. Focaccia works well, partly because it already has lots of fat in it ( no need for buttering) and also because it traditionally has rosemary in it. Leftover baguette slices are also very tasty. Ciabatta would probably be fine, if chewy.
2. The amount of milk will vary depending on how dry your bread is. Baguettes need more milk than focaccia, because they're much crustier.
3. Crustier also means more soaking time required. Before you bake it, the bread should be pretty well moistened, but not dissolving, and there should still be just a little bit of liquid around the edges of the dish if you tilt it up.
4. You don't have to use real milk. Water & dry milk is just fine.


 The important thing is to keep it simple. This is not fancy food, it's just a bunch of very ordinary ingredients that happen to taste really good together. You could use any cheese and any bread, but you don't want to frill it up with too may things going on. Plain bread, rather than something full of seeds or nuts, white rather than wheat. I like a mix of either medium cheddar or gouda, and the stuff that comes out of the green can, although that's just because I'm lazy. You can grate your own parm if you want.

You could even skip the lavender & nutmeg, but I encourage you to try it. The rest of the ingredients can verge on boring, and depending on how lavish you feel about the butter, the dish can be quite rich. Nutmeg is complex and earthy but not overwhelming, and lavender is almost atringent, which balances the fat and cheese.

I've made this at least half a dozen times, and once I made it with about a cup each of sauteed broccoli and cauliflower in addition to the bread. If you want to try that version, brown an onion and some minced garlic along with the veggies. You'll also need to increase the amount of milk and eggs by about half. Just eyeball it, it'll be fine.

Saturday, April 21, 2012

Granola Bars


I am a secret hippy. The smell of food co-ops makes me all nostalgic, because I hung around so many hippies when I was a kid. There is something about the type of utterly sincere yet completely dodgy presentation food co-ops have that feels very homey to me. I started thinking about it after I made these when I had a huge jones for granola bars last week. The toasty oatmeal and burnt raisin aroma kinda brought it back for me. Probably the sugar rush might have had something to do with the sudden feeling of well being too. These are not some dreary, self righteous wrestling match for your jaw and GI tract, they are cookies, by goll, and they are delicious. They are also good for breakfast, smushed into warm milk, with sliced bananas.

2 1/2 cups old fashioned oatmeal
1/2 cup raw sunflower seed kernels
1/2 cup toasted nuts
1/2 cup raisins
1/2 cup chopped date bits
1/4 cup toasted flax seeds
1 T butter
1 t oil
1/3 cup honey
1/3 cup brown sugar
2 tsp vanilla
pinch of salt

Put the oatmeal and the sunflower seeds on  a sheet pan and toast them at 350 for about half an hour. Stir them every few minutes, or they will burn. When you take them out, turn the oven down to 300.

Put the butter, oil, honey, sugar, vanilla and salt in a small sauce pan over medium heat and stir until the sugar has all dissolved. Mix all the ingredients together and press into an even layer in an oiled 9 x13" pan. Bake for half an hour. Let them get mostly cool before you cut them into bars.

notes-

1. The kind of nuts and seeds you use is really not important. Basically you have 2 and a half cups oatmeal to one cup fruit and one cup nuts and seeds. Mine have hazelnuts, because that's what I got. I did this with sesame seeds once before this post, and they were a tad bitter; flax seed is more popcorny.
2. It's important to get the ingredients toasted. They taste better.
3. These get sticky mighty fast. Keep them in an airtight container or wrap them individually.
4. They are really sticky before they are cooked too. Use one of those silicone spatulas to press the mix into the pan or it will get all over your hands. Press them down again as soon as they come out of the oven too, since they will poof up a bit as they bake.


Monday, April 16, 2012

What makes it stir-fry, anyway?


A few things.

1. Temperature. Hot. Like oh wow aggravate my anxiety disorder hot stove hotsie hot.
2. The order things go in the pan. Think about what you're cooking. Does it take a while to be done, or do you just need to show it to the frying pan before you eat it?
3. Keep it simple already!

I have sat around watching my co-workers at the staff cafeteria swilling that revolting pap they call 'stir-fry bar' once too often. A morass of leathery meat bits, celery, onion chunks, mushrooms, carrots, cabbage, baby corn, pea pods, and bean sprouts weltering in a steam tray accompanied by uncle ben's minute rice and four basins of liquid which differ in color and viscosity if not in flavor is NOT STIR FRY. If it was ever stirred, I can't attest to it, and it sure as hell was never fried. I don't give a crap if it isn't authentic, but for chrissakes, that isn't even food.

Take a look at my dinner. Tofu and baby bok choi stir fry. 2 ingredients. That's it. I do distinguish between seasonings and ingredients. Ingredients are what you make the food out of. You make a stir fry because you have one or two good ingredients and you want to know what they taste like together. Ingredients are what you've got that's worth eating a meal of. Seasonings are what you use to spruce things up a bit, that's all. Seasonings are the little whatevers you put with your ingredients that make you go 'Oh, hey, tofu is good. I could really fancy me some stir fried tofu for dinner. Seasonings are not for covering things up with, and ingredients are not made better by throwing a lot of them into a kludge and reaching for the viscous brown/yellow/orange stuff.

Ingredients: half pound each of tofu and baby bok choi
Seasonings: oil,onion, ginger, salt, pepper, sesame oil and soy sauce.

You don't need a wok. I hate those pseudo-woks with flat spots on the bottom anyway, but that's a whole different set of problems.

Use a fairly large, heavy, frying pan. No non-stick pans!  I use cast iron.  Put 2 or 3 tablespoons of vegetable oil in the pan, along with just a dash of sesame oil for flavor. Turn the burner on to medium high and when the oil shimmies in the pan a bit, salt the pan and set about a half pound of tofu cubes in it. Ignore it while you mince a teaspoon of fresh ginger and cut half an onion into very thin slices. Chop up the baby bok choi a bit too.

By that time, your tofu should have developed a nice brown on the bottom. If it hasn't, the burner isn't hot enough. Turn it up a little. When the tofu has browned on one side, flip it over and shove the chunks over to one side of the pan. Add a little more oil if necessary, then put in the onions and ginger. Stir the seasonings around a few times until the ginger looks a bit brown but not burnt.

Add the greens, stir everything up and then sorta poke the greens down into the pan. Stir and poke for about a minute, and add a tablespoon or two of water if the greens are too dry. Add a few shakes of pepper and a splash of soy sauce. It's done when the dark green parts are wilty and the light green parts are just going transparent around the edges.

There's fried rice in the picture. Fried rice is a kind of stir fry, folks, so apply what you just learned.

Ingredients: Stale cooked rice, an egg.
Seasonings: garlic, salt, black bean sauce, oil

Hot up your pan with some oil and salt. Crush in the garlic to brown it for a second, then stir in 2 cups of rice and a tablespoon of bean sauce. Cover the rice for a minute, until it is hot through and developing crusty places, then crack in the egg. Stir until the egg is cooked.

I think I've only made one post about stir-fry before because it just doesn't seem very complicated to me, you know? It's really just pan-grilling a few things, and throwing some marinade stuff in the pan with it like a lazy-ass. Stir fry was what there was to eat in my house when I was a kid on the nights when there wasn't soup. It wasn't exciting by any means, but I do remember thinking that mostly it was pretty good. So then I grow up, and there is the staff cafeteria, and it just irks me to see people eat such nasty stuff, thinking that it has anything at all to do with stir fry.

Thursday, April 5, 2012

Falafel update


The first time I made falafel, I stuck to the traditional fried version. It was delicious. But deep frying is messy, and it is an amazingly inefficient way to use oil. This time I baked them, and I also remembered to take pictures.

Baked Falafel

Use the ingredient list from the original falafel recipe. Assemble the  ingredients as per the original recipe too, up until the cooking part. Then,

1. pre-heat the oven to 450
2. add 1/3 cup oil to the falafel mix and combine well
3. drop 2" blobs of mix onto an oiled cookie sheet
4. bake for 30  minutes.

They taste remarkable similar to the fried ones, but there is a tendency for them to be a little dry. I have some ideas about how to fix that, to wit:

1. Soak the beans longer. I got impatient, so these were under water for only about 12 hours. 24 to 36 hours might be better.
2. Leave a little more water in the mix, duh. Bean starches need a deal of moisture to cook nicely.
3. Make sure the blobs are big enough. If they're too small, they'll dehydrate.
4. I might make these in a mini muffin pan next time. Less surface area exposed to air, for one thing, and for another, if I make a moister batter, the muffin tins would help the bits keep their shape.

Really, this is a very nice way to avoid having a bucket of semi-used oil and a slick of grease on everything in your house. Moreover, its far less work. No standing around hovering over your fritters, just plunk them in the oven and set a timer. I think with some tweaking, this recipe could be improved enough that it would be comparable to the original. If I make it again, I'll tell you how it goes.

Sunday, March 18, 2012

Because you asked so nicely


Here is my version of dad's pork baodze.

1/2 lb ground pork
3/4 lb green cabbage
1/2 of a medium onion
1/2 teaspoon salt
1/2 teaspoon pepper
1 teaspoon minced fresh ginger
1 tablespoon dark soysauce

Chop the onion and cabbage coarsely then puree them in a food processor. I am not exaggerating. Process the veggies until they are a fine mush, or slurpee texture. Squeeze as much liquid out of the veggies as you can, then mix all the ingredients together.

Use the dough as described previously.  Assemble the baodze in the usual manner, proof for 20-30 minutes, then steam or fry for about 15 to 20.

I hope that demystifies things for you all.

As usual, here are some tips.

1. If you cut the dough into marshmallow size bits, that seems to be just right.
2. Don't put more than 1 1/2 ounces by volume of filling in each one, or they will take to long to cook.
3. This recipe makes about a dozen baodze, and you will have some dough left over. If you cut the left over dough into slightly larger blobs and steam those after they have risen, you will have mantoh, which are traditional, and more to the point, taste good with soup.
4. The type of veggies is not altogether important. I had cabbage, so that's what I used. The finished product will have subtle differences in taste depending on what you put in it.  Dad frequently used other things, typically a mix of napa and celery, or skipped the veggies entirely. "That's pure meat! No cheating stuff!"

You'll notice that this recipe is is made in human-size portions. Dad only ever seemed to make these by the gross, otherwise it was "not worth the trouble". It is true that when I was small, he was cooking for a household of 3 adults and 4 growing children, so vast amounts of food were probably in order. On the other hand, these days, who does that? That's just crazy. Personally, I am finding it very well worth the trouble to make a dozen baodze at a time.

Also, watch out while eating them. They make a sort of puddle of their own broth inside the dough which can scald an unwary or impatient eater.

Sunday, March 11, 2012

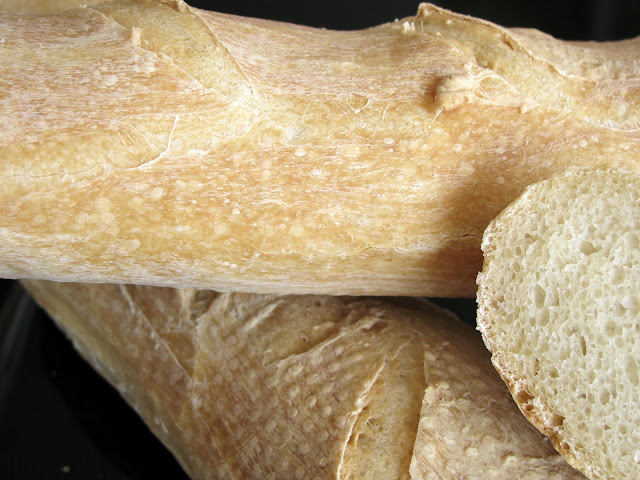
Back to the Baguettes


You know, I really was very happy with the way the original baguette recipe turned out. It was delicious. The thing is, I actually wanted to make a baguette like the ones you get at restaurants for putting cheese spread on. They're extra chewy, and they have holes in them. The original recipe didn't quite do that, besides being fiddly. So after all my other bread experiments, I returned to the idea of a baguette recipe for a lazy person.

1. Make the magic pizza dough recipe.
2. Let it lurk in the bottom of your fridge for a week. Really.
3. Preheat the oven to 470.
4. Poke the air out of the dough, but don't knead it.
5. Divide it in half, and pull and twist each half into a rope about 18" long.
6. Let them rise for about an hour.
7. Put them in the oven, and just before you close the door, pour about 1/4 cup of water on the floor of the oven.
8. No peeking for the next 20 minutes!

All those 'artisan bread' recipes, and all that hoopla, and all those arcane formulae, and all that nonsense? Totally unnecessary. The thing with dough is that if you mostly leave it alone, it will make itself! Just squish together the ingredients, let them sit around in the cold until they smell a little funny, let them poof up in a warm place, then cook them until the outsides are crunchy. Please try it, it's positively magical.

That was the enthusiasm part. Here's the slightly technical stuff. If you're feeling nervous, you don't need to read all the crap below, it's just me geeking out. As long as you follow the 8 steps above, you'll do just great.

- I cannot recommend a bread machine strongly enough. You put stuff in it, press a button and boop it makes dough. Awesome.
- You notice how much of this recipe is just waiting around. Yes, dough makes itself, but it does so in it's own good time. Fortunately, you can ignore it while it does its thing. I set myself a timer, or I will forget about it.
- The water on the oven floor is what makes the outsides of the baguette a little blistery and more chewy. I've heard some people recommend a couple ice cubes, but I don't have those in the winter. Why would I? It's cold out. In either case, it's important for the oven be very hot in order to turn the water into a cloud of steam, which means that:
- I really do want for you to have the oven on for an hour before you put anything in it, that isn't a mistake. For one thing, the stove top makes a nice warm place to proof the baguettes (do be aware that many ovens have a vent that comes out through one or the other of the back burners. This'll make a hot spot in that area, so make sure you don't put the dough right over it or you'll cook it to death), and for another, I'm assuming that you don't have a convection oven. My oven is a regular old not at all special electric, and leaving the oven on all that time ensures that the oven itself, not just the atmosphere inside it, is well hot before putting anything in there.
-This has to do with the behavior of ovens. An oven has a thermostat in it. That thing measures the temperature of the air inside the oven, and when the air temperature is up to say, 470, the oven says that it's pre-heated. Should be fine, right? Well, yes and no. When you open the oven, all that hot air flies out the door, and the temperature falls. That would happen no matter how long the oven had been on, but if the mass of the oven itself has not had time to accumulate heat, it will take much longer for the air inside it to return to the correct temperature, especially if you put a tray of relatively cold dough and a couple ice cubes in it. Moreover, after an hour, the heat is radiating off the whole oven evenly, not just off the oven elements on the floor. High, steady, even, heat and a shot of steam is what makes fancy looking bread.
- What if you don't want to wait a week for your bread? You can just leave the dough in a container on your counter overnight, instead of in the fridge, but this is slightly uncontrolled. In the winter, it works fine for me because the temperature of my house is pretty low at night. In the summer I think the dough would end up tasting pretty beery, because it gets really hot in here and the yeasts would go crazy in the heat for that long.

What did people do in the dark ages before they had instant yeast and refrigerators? Well, they woke up at 4 in the morning to catch the dough at the right stage of development, and they fiddled around with sourdough cultures which would get contaminated from time to time and wreck the bread, and pretty much had to make a profession of it for it to be worthwhile. Baker is not a noble family name, but it is a respectable one, I think.

Wednesday, March 7, 2012

Feed a cold


Feed a cold, they say. Feed it what, they do not. I assumed that they probably didn't mean my regular 2 toast 2 fried egg breakfast, but a breakfast without toast and eggs would make me feel despondent. This is like salad lyonaise, but with way less fuss.

Arugula
a couple pieces of bacon
some leftover yam fries
a fried egg
vinaigrette

And a little toast of course, gotta have toast. Details:

Yam fries are easy. Peel a yam and cut it into sticks, toss with salt, pepper, and olive oil, then bake at 425 for half an hour. Turn the fries over, and bake another 20-30 minutes depending on how dark you like them. They keep really well in the fridge for using in salads and for snacks. Heat them up in the frying pan for this salad.

The vinaigrette I used is equal parts really cheap, rather sweet balsamic, and a pretty nice, highly acidic sherry vinegar, plus some decentish olive oil. Add a pinch each of salt & pepper, a good chunk of lemon rind, and bit of chopped fresh oregano, then shake everything up. It's better after about two or three days in the fridge.

Then you wake up with a cold, throw the bacon, fries and egg in a skillet, stack them up on a heap of arugula when they're as cooked as you want them, spoon on the vinaigrette and smash it all together.

You know, I looked at the original recipe and all I could think was Wow. Who the hell wants to do all that first thing in the morning? Not me, for sure.

I'll tell you about the baguettes next time.


Tuesday, March 6, 2012

bacon pone


I made this bacon bread once before, but I think it looks a lot prettier this time. I used an enamelled pan, for one thing. My cast iron skillet did a great job on the onions initially, but the iron made the onions turn green by the next day. Very weird looking. Secondly, you simply don't need as much liquid as the recipe calls for. I think I reduced it by about half a cup- I left out the water and used sugar rather than molasses. Over all, it was a big improvement. Third-party taste test says it's a winner.

I do stick with my reccomendation for salad as an accompaniment. That's arugula and roasted squash, with some kind of hard cheese that had no label on it. It's pretty nutty, like a parmesan or asiago, and a little smelly, but that could just be my fridge.