Saturday, August 8, 2015

A Doubtful Guest


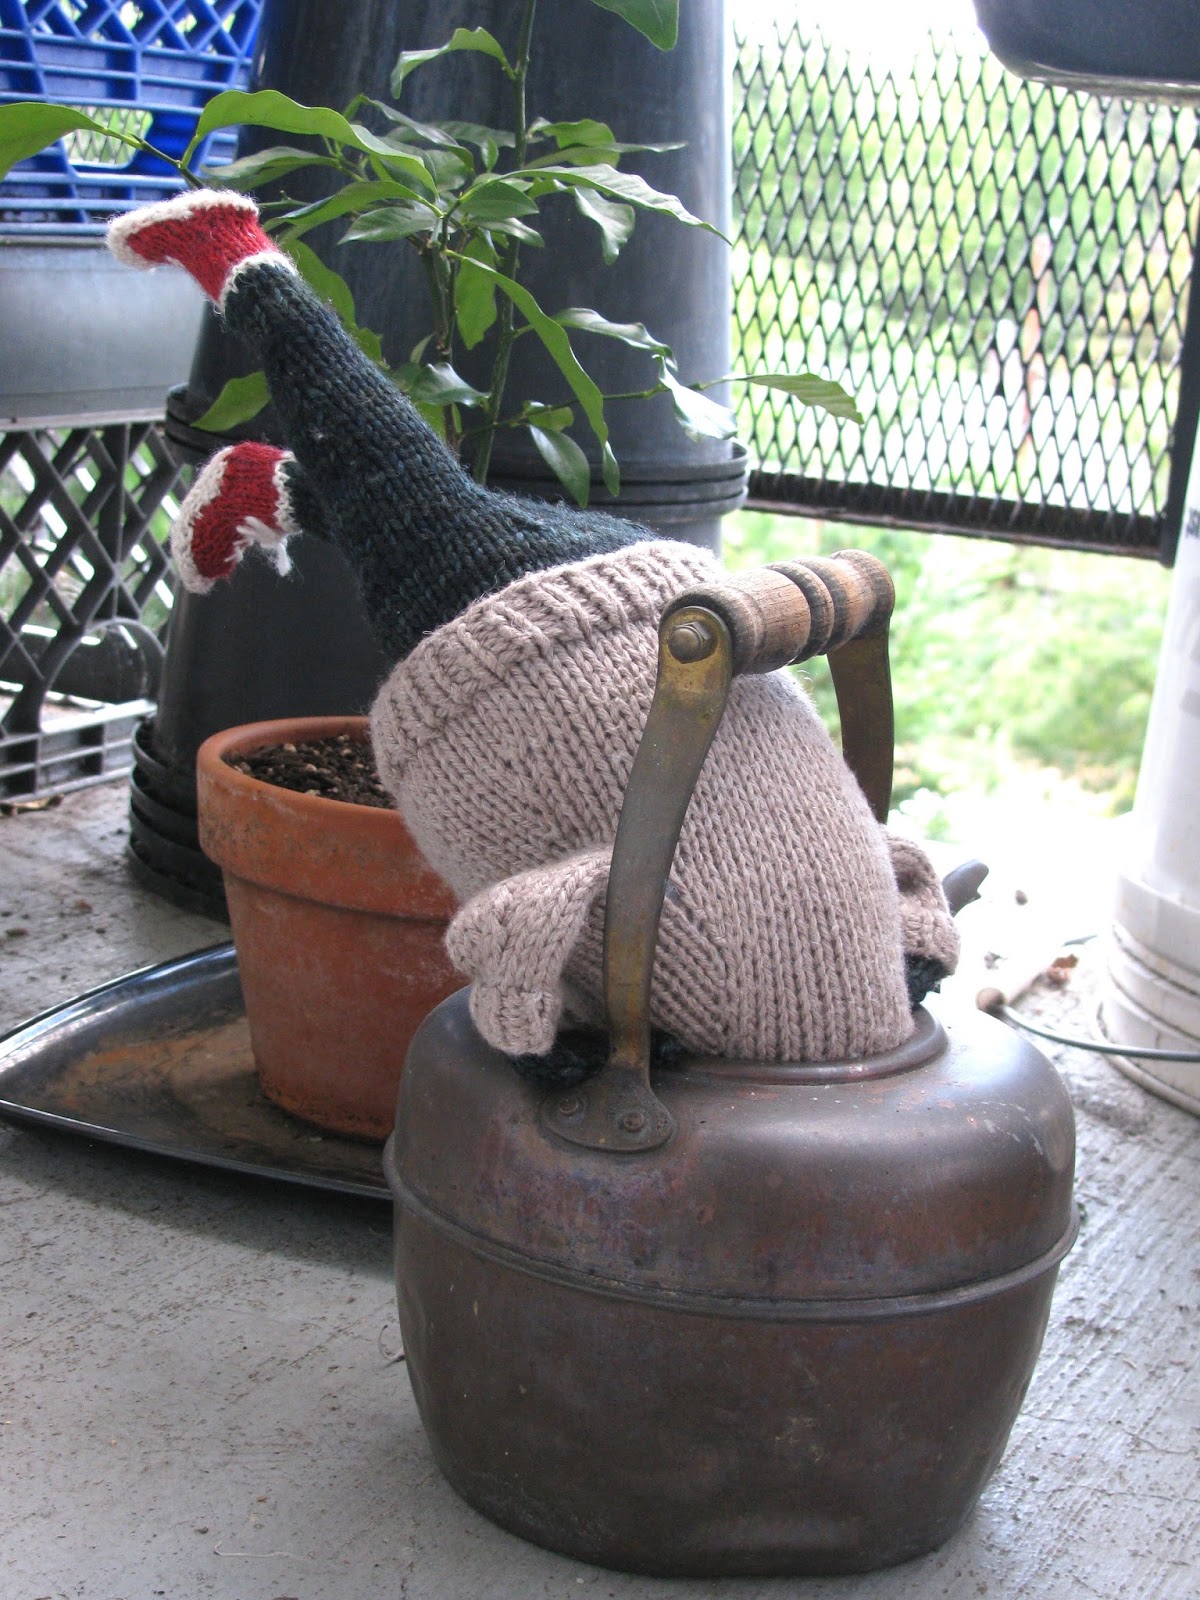
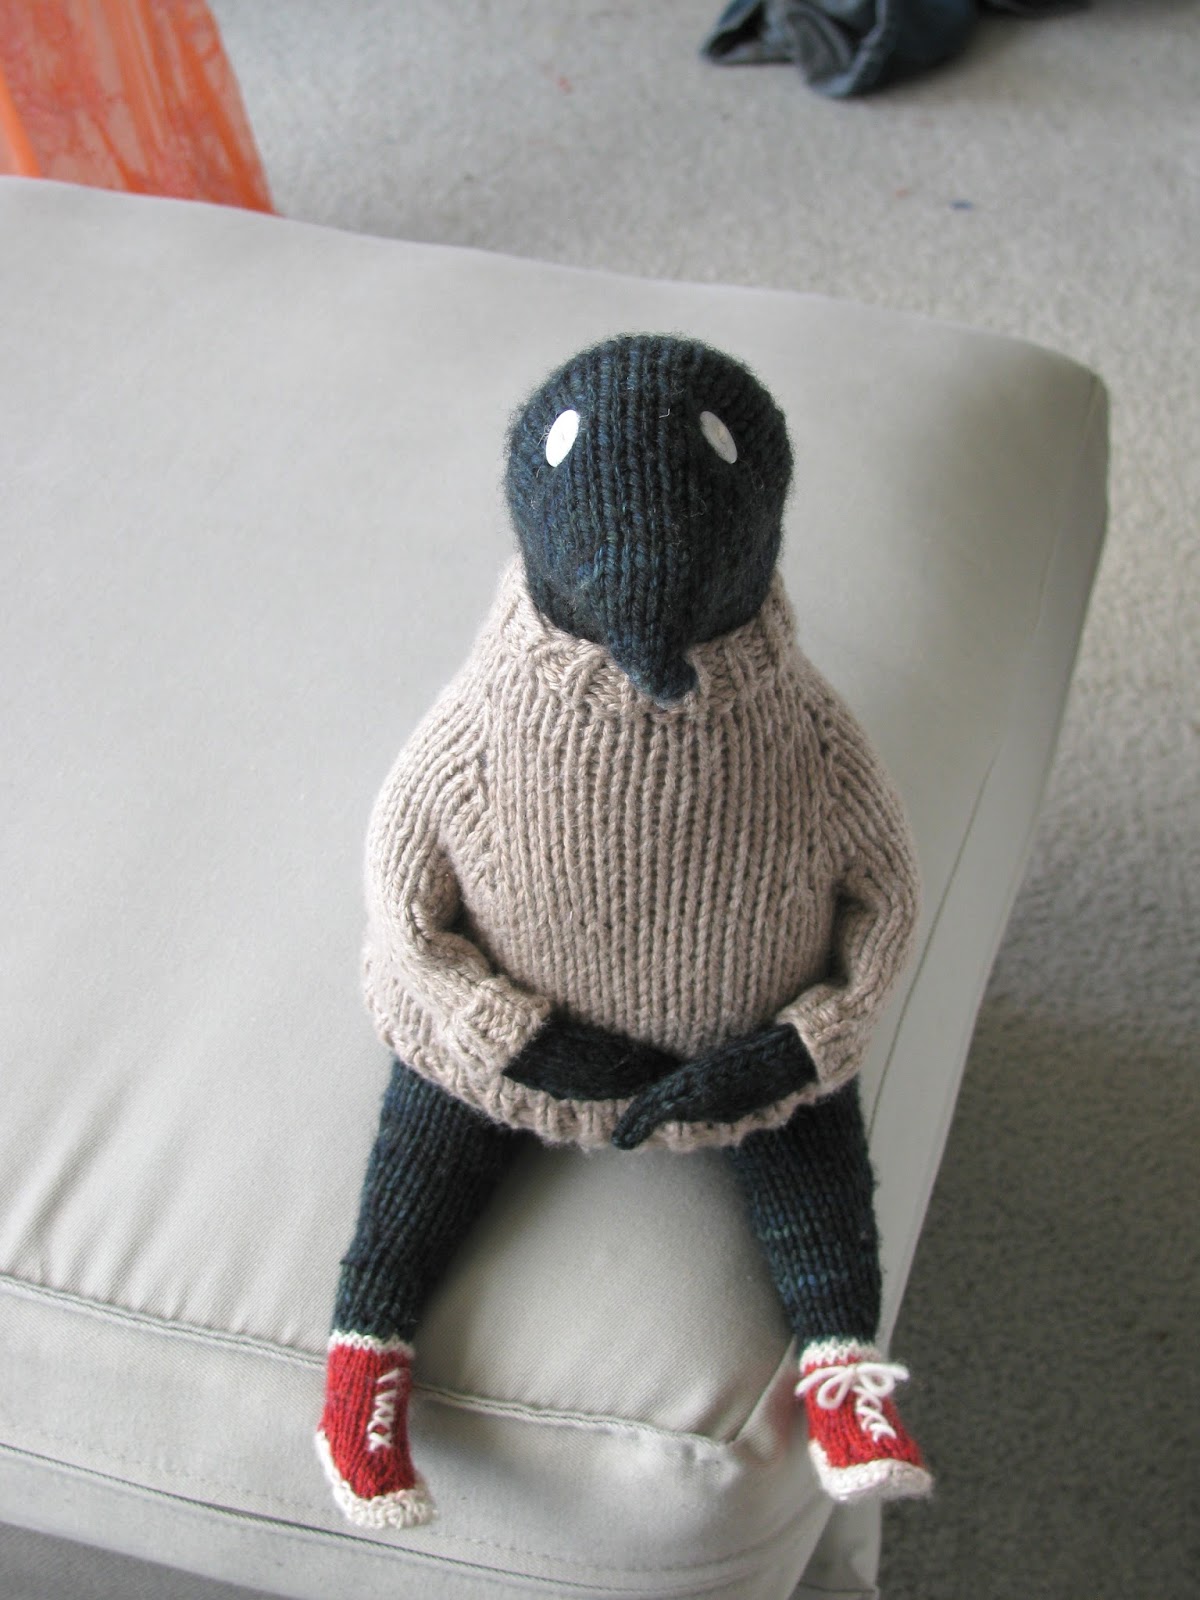
So this thing showed up on my porch chair. I invited it in.


It seemed harmless enough...


But then,
it just made itself right at home.


Really at home. It has no manners at all.

 NONE.   


 Its a nosy parker,


fancies itself a literary critic,


and is a total couch hog.


David gave it a comeuppance.


 But they have since made up their differences.


Which is good, because it looks as if it means to stay for quite a while.


Sunday, October 26, 2014

Pineapple Cake!


I had some leftover pineapple slices, so I decided to make an upside down cake. I don't know anything else to do with a pineapple. You will need a spring form pan.

1/2 cup butter
1 cup sugar
1 tsp vanilla
2 eggs
2 c flour
1 tsp baking soda
1 tsp baking powder
1/2 tsp salt
1 1/2 cups greek yogurt

some pineapple slices
brown sugar
a dab of butter

Pre heat the oven to 350.

Beat the butter, sugar, and vanilla until light colored and fluffy. Beat in the eggs one at a time. Put all the dry ingredients in a sifter, and add one half at a time to the batter, alternating with yogurt.  Mix thoroughly after each addition.

Assemble your pan, then put about 1/3 cup of brown sugar and a dab of butter in it. Add a couple teaspoons of water. Turn a burner on medium, and then carefully melt the butter & sugar together, stirring to prevent burning. When the sugar is mostly melted, remove from heat and swirl to coat the bottom of the pan.

Cover the sugar with a layer of pineapple slices then pour in the batter. Gently thump the pan on the counter a couple times to shake out any big air bubbles. Place the pan on a cookie sheet, because it will leak. Bake for an hour and a half, approximately.

1. Yes, it really did take me 90 minutes to cook this. I turned the pan around once in the middle because my oven pretty much sucks.
2. The original recipe is for a sour cream coffee cake. So you could use that instead, but greek yogurt sure did the trick.
3. Maybe this is what I needed to use those plums for. I bet it would be delicious.
4. I used fresh pineapple, but I'm sure canned would be just as good.
5. I also didn't have any maraschino cherries, which I think are very important to a pineapple upside down cake. It just isn't the same without them.

I have no idea how people managed to make cakes before the invention of electric mixers. I paid 6$ for a used one at goodwill. It's a piece of crap, but it has made a batch of Mexican wedding cookies, a tart crust, and this cake this month and it was worth every one of those 600 pennies. This cake wouldn't have been half as good without it, because inflating the batter with minute air bubbles is one of the things that makes a proper cake.

This isn't perfect, but it's still very good cake. It stayed moist even after an hour and a half in the oven, and is neither too rich nor too rubbery. If you hate maraschino cherries though, at least have some ice cream with it.


Wednesday, October 1, 2014

More about knitting


I'm not a serious knitter, by which I mean that I haven't been knitting since I was a wee sprat, and I spend less time making actual things than just dinking around. I've only been doing it regularly for about 5 years, or less. This means that I am still discovering things about knitting that are interesting.

For instance, I don't think about knitting the way people who design knitting patterns do- 'make 1 increase every 3 rows for 6 inches, then bind off 6 stitches using smaller needles...' I usually think something like 'well, I think I just gradually make it bigger starting here, and when it's long enough, I'll stop.' That kind of thing works fine for making simple shapes without any fancy textures, but for something more complex I'm still in the woods.

Therefore, swatches. I got the Barbara Walker stitch dictionary about the same time as I found a bag of mini skeins at goodwill. They're the perfect size for swatches: they're small enough that by the time I decide the yarn is too prickly, or the pattern is just stupid, I'm done anyway. I've learned some things about the nature of knitting this way:

Merino yarn really is a amazing as everyone says it is. It's lightweight, cushy, springy but not to springy, holds its shape well, and and looks a little glossy when worked up.

Fancy textures just look like crap when knitted in variegated yarn. No matter how beautiful that striped yarn looks with its 5 different colors in a ball, it will knit up a splotchy, uneven, formless mess. And you will not be able to see that fancy stitch clearly. Just don't even bother.

The most interesting thing that I've realized is that knitting has syntax. That is, patterns cannot be knitted backwards. In one sense, well duh. But it's why they don't reverse that is cool. Think of it this way- since knitting is basically just rows of loops going through other loops, it ought to work just as well if you go from the top to the bottom as from the bottom up, right? Not really. It works for plain knitting, because every row has exactly the same number of loops, and each loop stays in the same relationship to the other loops for the whole way. But if you knit a pattern, you change the relationship of each loop not only to the loops next to it, but in relation to the row before and the row after it! I'm sure experienced knitters would roll their eyes at me here. Whatever. The idea was a new one to me.

I tried to reverse the order of a particularly complex and beautiful pattern because I wanted a sweater knitted from the top down rather than bottom up. Did not go well. I never did manage to approximate anything like the original pattern, because I couldn't figure out the increases and decreases. On the other hand I gained an appreciation if swatching. Those are my swatches up there. I have a whole bag of them and they look like quilt pieces so maybe someday I'll make a very strange and off-putting cushion cover out of them.

Monday, September 22, 2014

Plum Tart


This is the third or fourth time I've used this crust recipe, and I've been trying to figure out if there's any reason not to use powdered sugar instead of regular. I don't think there is, but so far I haven't tried it.

These plums were growing in the yard of the vacant house next door to my sister. They're pretty good plums for cooking, not too sweet or too juicy. I made the crust as for for the jam tart pretty much exactly, but then put in a layer of sliced plums instead of jam, sprinkled a spoon or two of sugar on them, and skipped the marzipan.

I should have cooked it for a few more minutes, but the plums came out perfect. They got soft but not mushy, and were the perfect balance of sweet and tart. A little plum juice ran out and made the crumbs slightly fruity and cakey, and the almonds gave it crunch. I might have to get some more plums from the abandoned house before they all fall off the tree.

Saturday, September 13, 2014

The Things I Do for Love


I hate macaroni salad. I hate the squishy, stiff texture of the noodles, I hate the slimy miracle whip based sweet/sour/sickening yellow substance that glops around them. I hate the pickle bits that are sometimes mixed in. It manages to be both indescribably bland and utterly offensive. It is the cuisine of middle America at its nadir.

I have never made macaroni salad in my life. Until today.

David has a paradoxical love of macaroni salad. He dislikes mayonnaise on sandwiches, and I can't figure out why he likes it on cold noodles. But he was out of town this week, and I missed him,and he asked me to make some macaroni salad. So I said ok. I asked him what he likes in his macaroni salad. He said

'Little pieces of carrot. And pepper. And those...green things.'
'Celery?'
'Celery.'

So there you have it.


Boil a cup of macaroni in salty water. Cook them a little softer than you would if you were going to eat them like spaghetti. When they're done, rinse them under cold water until they are quite cool.

Cut up 1 small carrot and 2 small ribs of celery into 1/4" dice. Mince a few leaves of parsley, and half a green onion. Put everything in a large bowl and add a large scoop of mayo and a tablespoon of the best quality coarse-ground dijon mustard you can find. Add plenty of coarse black pepper and stir it up.

Chill it for a while. Pour yourself a drink and feed the macaroni to your boyfriend. Secretly enjoy eating a serving yourself.


Wednesday, June 25, 2014

Pachydermoids


I made some little elephants. The pattern is by Ysolda Teague, and the directions are just delightful to use. I used smaller yarn than called for, and smaller needles, but other than that I pretty much followed the directions exactly for the first elephant, and only made the ears different for the second, smaller one.

The bigger one looks pretty much like an elephant, so I added a tail, which the directions don't call for. I also didn't have enough yarn to make a whole elephant in gray, so I switched to red for the body so he looks like he's wearing a little onesie. I added a butt flap to complete the impression. He's stuffed with Poly fill. This makes him quite lightweight, and very squishy, which is nice, but his arms and legs are a bit stiff or something.

I made the next one on even smaller needles, but with the same yarn, resulting in a much denser knitted fabric. Partly I just thought the miniaturization would be cute, and partly I wanted to fill it with beans and thus needed to make sure the knitting was tight enough that the beans wouldn't work their way out. That aspect was perfectly successful: the beans gave it a nice weight and the arms and legs are appealingly floppy, and slightly poseable. On the other hand, the ears turned out a little unexpectedly. I think they look more elfin than elephantine. I like the construction of the alternate ears; they are flatter at the edges than the originals, but the proportions are a bit whimsical. I now have a strange little house gnome rather than an elephant. I think it needs a tail, but I'm not sure what kind, I'll have to think about it.

Here are more pictures.


Saturday, June 21, 2014

Tiffin!

I always have to say it like Timmy from the Simpsons says Timmy!

Tiffin!Tiffin!

It looks boring as hell. I can't remember what made me look up a recipe, and once I made some I didn't even want to take a picture of it. It has such a loyal following that I thought well whattahell, it can't be all that great.

But it kinda is. It's like if a Kit Kat bar was really as good as the TV ads say it is. But more like the graham cracker pie crust of the gods. With chocolate. It's definitely not cake, or a cookie, and you wouldn't say it was candy either.

8 oz TJ's lemon wafer cookies, the ones with chocolate drizzles
1/3 cup yellow raisins, optional. If you do without, add another handful of cookies.
1/3 cup butter
4 T cocoa powder
3 T syrup
2 T sugar

about 4 or 5 oz of chocolate

Smash up the cookies. Don't totally powder them, there ought to be a few pea-sized bits left. Add the cocoa powder and raisins.

In a small sauce pan, heat the butter, sugar, & syrup. Bring to a gentle boil for about 5 minutes, then pour over the rest of the ingredients. Toss everything together until thoroughly combined, then press the mix into a cake pan. Melt the chocolate. Pour it over the mix and swirl the pan around to create an even layer on top. Cool the tiffin in the fridge, then break or cut it into candy bar sized pieces.

Notes:

1. Traditionally, you are supposed to use a mild, dry, not very rich cookie for this. But i really like those lemon things.
2. Also, authentic recipes will call for 'golden syrup' which I think is very similar to pancake syrup, but I've never had any so I don't know. I used some scandinavian baking syrup I got at ikea.
3. Lastly, the recipe I based this on called for half dark and half milk chocolate, melted and mixed together. So I just used semi sweet baking chips.

Dang this stuff was good. The lemon cookies are very crispy, but not hard, and the raisins make little tart, chewy fruity spots that bring out the lemon flavor. I used only one kind of chocolate, but it now occurs to me that if I had used half dark and half milk chocolate, I could have given it a marbled top instead of mixing the two together. It would have looked fancier, and maybe I'd have taken a picture.

Sunday, June 15, 2014

Improved Tamales

The first time I made tamales, I fell into the trap of thinking that it had to be difficult to make them, because they are delicious, and mysterious, and somewhat exotic to me. In hindsight, this was a pretty silly thing to assume, because like all really good comfort food, tamales are what poor people with few resources in terms of time or equipment make to feed themselves with. I'm sure the procedure outlined in my first attempt is just fine, if you want to make things hard on yourself, but this is easier, and comes out better. You do not need a mixer, just a big bowl and a spoon or spatula. You don't need to whip the shortening first, and then add little bits of this and little bits of that, just whack it all together. And for crying out loud, just use baking powder. No one in their right mind is going to turn their nose up at your tamale because it is too fluffy and delicious!

Start by putting half a package of corn husks in very hot water to soak. Weight them down with something so they stay submerged. This will make 10 to 15 tamales depending on how big you want them.

Then take

3 1/2 cups masa for tamales
2 1/2 cups nearly boiling water

Mix these 2 ingredients thoroughly, until the masa is evenly moistened. Cover and set aside for about 45 minutes to hydrate while you assemble whatever you want to put inside them. I used little sticks of cheddar and a half jar of roasted green peppers that was in the freezer. When you're ready to assemble things you will need:

More warm water
1 Tablespoon baking powder
2/3 cups shortening- I used about half butter and half bacon fat.
salt
Aluminum foil


Break up the hydrated masa and mix in the shortening and baking powder.. A wooden spoon or something else firm is good for this. When the shortening is well incorporated, gradually add enough water to give the mix a soft play-doh consistency. Salt to taste.

Take about half a cup of dough and squish it onto the center of a corn husk. Form it into a square about 4" across and put few bits of filling down the center. Roll the whole business up, fold over the narrow end of the husk and leave the other end open. Tear a off rectangle of aluminum foil and firmly wrap the tamale with it.

To cook, fill a stock pot or other deep cooking vessel with about 4" of water. Put the tamales in the pot so that the open ends of the tamales are pointing upwards. Boil for about 45 minutes or until the cheese explodes out of the wrapper and makes a mess.

 Notes:

1. Remember to keep track of which end is the open end of the tamale! I folded the foil wrappers so the ends were easily distinguishable.
2. Use fresh masa. Mine was rather old, and while the texture is great, the taste is a little disappointing.
3. You can use any type of shortening, even cooking oil, I bet.
4. Likewise, you could use stock instead of water. I was just trying to keep things simple.
5. Use enough salt. Tamales don't even have to have fillings, it's really about the steamed masa, so make sure that stuff is well seasoned.
6. Try to keep the filings well encased in the masa. Tamales expand significantly during cooking, which puts a lot of pressure on the insides. 

Expansion is why you leave one end of the tamale open in the first place. If you wrap the whole thing up as tight as possible, you're just setting yourself up to have the husks rupture and make a giant gloppy mess in the cooking pot. It's better to leave one end open to give it a little extra room at the outset. Foil wrapping helps too. It eliminates the need to use little strings to tie up the husks, and keeps excess water out of the tamales while they're boiling.

This recipe is so much simpler than the previous one that I am again considering making my own tamales regularly.


Sunday, June 8, 2014

Jam Tart


The filling is just a layer of store bought jam, so there's nothing amazing about that, but the crust is quite remarkable.

3/4 cups butter
1/2 cup sugar
1 1/2 cups flour (about 200 grams)
1/2 teaspoon almond extract
1/8 teaspoon salt
sliced almonds
jam

optional: 1/3 cup marzipan

Pre heat the oven to 350.

Cream the butter & sugar with the salt & almond extract until the mixture is fluffy and light colored and the sugar grains are dissolved. Gently mix in the flour. Put 1/2 cup of the dough in a bowl in the freezer to stiffen up. Press the rest of the pastry into a tart pan; be sure to make the crust as even a thickness as possible. Spread a thin layer of jam over the crust. Take the reserved crust out of the freezer. If you're using marzipan, use a pastry cutter to combine it slightly with the reserved dough. Break the mixture into crumbs and sprinkle it over the jam, then add a few almond slices. Bake until the crust is lightly browned, 40 to 50 minutes.

1. I over cooked mine. I didn't want it as brown as the picture. It was also a smidge tough.
2. The original recipe says to use a 9" pan. Mine is bigger than that, which is why I decided to use a little marzipan in the topping to spread it out a little.
3. Real butter. Not margarine. Not shortening.
4. Do not skimp during the part about 'cream butter & sugar until fluffy'. This is all-important!
5. I used blackberry jam, but I bet it would be really good with marmalade, or figs, or plum jam.

This crust is both amazing and very strange. Essentially what you do is make a buttercream frosting, then mix in enough flour to make a kind of heavy spackle which you then coat the inside of your pan with. Conventional pastry has a tendency to shrink and toughen when it is cooked, but this stuff does not shrink, and at least when it isn't overcooked, stays tender and shortbready. I suspect that the reason for the lack of shrinkage is the fact that when you cream the butter & sugar, what you're doing is whipping minute bubbles into the fat. It takes quite a long time if you do this by hand, but the result is unlike anything else. The air bubbles expand in the oven, and since there is no added liquid in the recipe to evaporate out and cause shrinking, the crust retains its size and shape as it solidifies.

I used this crust recipe for a quarkkuchen a little later, with a little vanilla and lemon zest, and it was fantastic.

Sunday, June 1, 2014

Chocolate Cheese Cake


Jej mades a mighty delicious chocolate cheesecake. This is not exactly the recipe she used, because she has an even harder time following a recipe than I do, but we started with the same source material, and I added cocoa powder the same as she did. You will need a springform baking pan.

Pre heat the oven to 325.

crust:

2 cups peanut butter cookie crumbs
1/4 cup butter

Grind the cookies to a powder and put them in a microwavable bowl with the butter. Zap it for about 30 seconds, then mix the butter and crumbs thoroughly.  Press the mixture into the bottom of your pan and up the sides about an inch. Set aside.

Filling:

2, 8-oz things of cream cheese
3 eggs
1 cup sugar
2 cups greek yogurt
1/4 cup cocoa powder
teaspoon vanilla extract

If you have a food processor that is big enough to do the whole recipe at once, put everything in it and process it until it's smooth. (I don't have such a thing, but I do have a blender, which worked but was not too happy about it. ) Pour the filling into the crust and bake for an hour. See note #1! It will be still a little jiggly when it comes out of the oven, that's ok. Let it cool at room temperature for an hour, then stick it in the fridge over night and it will set up.

1. My oven is known to cook very unevenly. To compensate for this, I baked mine for 25 minutes, turned it around, and baked it for another 25 minutes. Remember, every time you open the oven, your cooking time increases by a few minutes so take that into account if you need to do the same.
2. Heating the cookie crumbs as well as the butter softens the crumbs. You need less butter to hold them together than you would if you were using crackers because cookies already have a high fat content.
3. Use full fat yogurt if you can get it. The original recipe calls for sour cream, so stop worrying about the fat content. It's a cheesecake for crissakes.

So why do I keep putting greek yogurt in things if I'm not worried about the fat content? Because sour cream is not a multi-tasking ingredient. I make my own yogurt because it's cheap that way, so that's always what there is in the fridge. In most recipes, you can use greek yogurt and sour cream interchangeably, but I can't eat a bowl of sour cream and cereal for my breakfast. Blerg. Yogurt is more tart than sour cream (which I like), and you have to be careful adding it to hot dishes because it can curdle, but mostly it's easier for me to use that than planning ahead and buying a whole other thing that doesn't go in anything else. I'm lazy, basically.

Saturday, April 26, 2014

Wow, it works!


I made a Rube Goldberg Machine, and it actually works! I've been knitting a lot lately, and given that decent yarn is terribly expensive, I took a notion to recycle the yarn out of sweaters from Goodwill. Which is all well and good, but it takes forever using a drop spindle.

Back when I did my initial experimentation, I had tried to figure out a method for using my treadle machine base to spin yarn, but my engineering was for crap and I abandoned the idea for several months. I was even seriously considering buying an actual spinning wheel to speed up plying the yarn I got out of secondhand sweaters, until I came across plans for building your own.

That's when I learned about scotch tension. See, when you spin yarn, 2 things need to happen. First, it has to get twisted. Second, the twisted yarn has to get wound up onto a spool or something. With the most basic type of spinning mechanisms, you spend a couple seconds twisting, than stop twisting while you wind up the string you just made. Scotch tension is a method for getting these 2 things to happen simultaneously!

As you can see, the gadget above has a spool (bobbin, in the parlance) mounted between 2 arms. The thing with the arms is the flyer. The flyer has a little wheel stuck on it, and the belt from the treadle table goes over the wheel and turns the flyer. This is what twists the yarn.

Well,  if the bobbin is sitting on the flyer, that means the bobbin is turning at the same speed as the flyer, and if all the flyer does is twist the yarn, how do you get the yarn wound up?

It is ridiculously easy: all you do is loop a little piece of string over the end of the bobbin, causing a teensy bit of drag. The bobbin will then turn just a little slower than the flyer, so that not only does the flyer twist the yarn, it rotates around the bobbin, thus winding and twisting at the same time.

The first time I read about how that works I thought well dang, that is just brilliant. I'd been looking at plans for spinning wheels that work using complex arrangements of drive belts and wheels with multiple grooves in different diameters calculated to cause various ratios of twist and take up, and it was all just too daunting. Scotch tension is so perfectly low-tech it's foolproof. Want your yarn less twisty? Tighten the string. Want your yarn to be more twisty? Loosen it. Want to make yarn faster? Pedal faster, silly!

Edit! Featured Instructable! Squeeee!!!!


Saturday, December 28, 2013

This should have peppers


I saw a short, annoying video about how to make shukshaka, which is a north african dish. The woman in the video had such irritating mannerisms that I'm not going to link to it. I'll just tell you about the food instead, which was just like this, but with bell peppers in the sauce. I have no peppers today and I don't have much else in the house either. This was quick and uses the kind of things that are left at the end of the week after I've eaten everything else, but before I go shopping.

1 onion
a generous amount of olive oil
a bunch of salt
lots of black pepper
some smoked paprika, maybe half a teaspoon?
a bay leaf
a sprig of rosemary

some garlic
1 /2 large can chopped tomatoes, or a whole small can if you have that.

a number of eggs

Pre heat the oven to 450.

Thinly slice the onion, and saute it in an oven safe skillet with the oil, salt, pepper, paprika and herbs. When the onions are a little brown and caramelized, chop up as many garlic cloves as you prefer. I used 2. Add those to the pan and let them cook for about a minute. Add the tomatoes, cover the pan and simmer for about 5 minutes. Taste for seasonings, give it a stir, and crack on some eggs. Mine is a 10 inch pan, and I used 4 eggs, but the number is up to you. Bake for 6 minutes, serve with some bread or something. If you put some greens on the plate, it will look a lot fancier.

notes:

1. Don't put the garlic in the pan at the beginning with the onions. It will just burn and taste bitter.
2. The original recipe says to saute some red bell peppers in with the onions, but I kinda like it this way. It's simple.
3. I made toast to go with it, but I bet it would be good over noodles too. Or rice.
4. When they come out of the oven, the whites will still be a little jiggly. If you like them that way, eat them at once, otherwise, let them stand for one minute. The sauce is so hot it will continue to cook the eggs for quite a while, just dish them up when they reach the stage you want.
5. In the summer when fresh tomatoes are cheaper, you could use those and I bet it would taste great. You might have to cook them a little longer before you add the eggs though.

I think the smoked paprika is key to making this recipe come out right, especially since there are no bell peppers in it. Smoked paprika is usually mildly spicy, but not cayenne level hot, and you can still distinctly taste the sweet pepper flavor too. You can be fairly generous without overpowering everything else in the dish. The smokiness of different batches varies somewhat, I've discovered, so you'll need to adjust the amount you use based on how much smoky flavor you want relative to how much spicy and how much bell pepper flavor. It's interesting stuff.

Wednesday, December 25, 2013

Merry %$#@#ing Blah Blah!


&%$#$!


I am bah humbug, but David really wanted a hermit crab. I will name it Hubert.

Seriously?!?!


Hubert expresses my mood, which, while not exactly disagreeable, is not at all festive.


Well this is just humiliating.


 I do not like this kind of sillyness, but I am willing to acknowledge that other people do enjoy such things.


C'mere an say that t'ma face, son!


I don't wish anybody ill of the season, I just want you to know that I find most of the usual ceremonial observances terribly off-putting.


Does this butt make my shell look big?


I offer to encourage you in your particular enjoyment, in exchange for being allowed to go on much as I do any other day of the year. With more sleep. And more cookies, probably more cookies.


this message approved by the admiral.


Happy Christmakwanzaakha.

Monday, December 16, 2013

The Most Frustrating Project in the World


grrrrr....

Among other things that Mom sent me last year was a large piece of coral-peach colored silk chiffon. It's just the most lovely stuff ever. I have a pattern for a blouse that is probably from the mid 1960's, and I thought it would be perfect for that, what with the ruffles and all. The chiffon is super soft, and the shade of pink is flattering, I was all excited.

Yup. Sheer.
Then I decided the pattern needed fixing. I originally thought I'd be able to use a single layer of fabric, but I didn't like the idea of having all the seams show, because the material isn't just slightly sheer, it is totally transparent. So I thought that I'd use a double layer. So, twice as much cutting.

Then I decided that I don't like the straight ruffles that the pattern came with. I wanted circular ruffles. So, cutting bias shapes. Twice each.

Finally, I decided that if I was going to double layer the material, I might as well get rid of the button front and make it a pull over. That may well have been my only wise decision.

Cutting silk chiffon is a bitch. It wiggles around on the cutting board like a sea salp with palsy. It sticks to itself. It is so fine that it is nearly impossible to pick up. It takes static cling like you wouldn't believe. You have to iron it with extreme caution, or you will cook it to death. And the thing that made me want to wear it the most, the drapey, soft, squishy texture, makes it nearly impossible to be sure that when it's laying down, the grain of the cloth really is straight.

I think this vexed thing has been in pieces on my table since late July or early august, and it is only just now beginning to look like a shirt.

There is one thing that I am still pretty geeked about though. I figured out a method for making the bust darts in 2 layers of this most irritating material.

1. Using a fine, slippery thread, baste down the center line of the dart.

2. With the same kind of thread, baste across the width of the dart, making sure that each stitch is the same length on each side of the dart, as in the picture.

3. Grab both ends of the basting thread and pull it taut.

The description doesn't make a lot of sense, so here is a little video.


Ta Dah!

Sunday, December 8, 2013

Pellets! With Lemons and Leaves!


This summer, David and I had this approximate conversation.


Him: I'm interested in learning how to cook those...pellets. 

Me: (elipsis)

Him: You make indian food out of them... You boil them...They turn into soup...

Me (further elipsis)

Him: They're little, and round. I don't know what they are.

Me: You mean beans?

Him: No! They're flat.

Me: Lentils. (hysterical laughter) "Pellets"!

Him: Whatever. They come in different colors.


Now I tease him by saying I'm going to feed him pellets for dinner. This is a good recipe for soup made out of pellets which I made because there is a cafe downtown that serves something very similar to it. It's particularly nice on a rotten rainy day. I eat it with bread and butter.

1 cup of pellets, the orange kind
1 onion, cut up rather fine
1 bay leaf
1 teaspoon ground cumin
1 teaspoon salt
1/2 teaspoon fresh ground pepper
1/4 teaspoon turmeric, optional, but fun
1 small carrot, cut into 1/2 inch bits
1/2 cup user-defined* leaves
juice of a lemon


Put the pellets in a large-ish pot. Rinse them several times to get rid of any dust or foreign objects. Add about 8 cups of water, the onion, bay leaf, cumin, turmeric, and salt & pepper. If you want a slightly richer flavor, add a pat of butter or a couple tablespoons of olive oil.

Bring to a medium boil for about 20 minutes, or until the pellets start to dissolve, then add the carrots and leaves. Taste for salt. Boil until the pellets are totally dissolved, and the soup is as thick as you want it. If it starts getting too thick, just add a little more water. 

Right before serving, add the lemon juice.

*User-defined leaves: I have used frozen chopped spinach, and leftover "baby power greens", whatever those were. Spinach is usually what is found in lentil soup, but there is no reason you could not use kale, chard, baby bok choi, arugula, lambs quarters, purslane, or any number of other things, as long as you remember that some leaves take longer to cook and have slightly more pronounced flavors.

Friday, November 29, 2013

Chicken and Hominy Stew


I had something like this at a very fancy wedding reception. I was initially put off by the squash, because usually things with squash in them are made too sweet for my taste (except for pie, and sometimes even then). But I changed my mind, and here is my version.

1 butternut squash
salt, pepper, olive oil

1 onion
1 carrot
2 celery ribs
1 or 2 garlic cloves
1 large or 2 small chicken thighs

dash of salt & olive oil

1 tsp cumin
1 tsp dried oregano
1 pasilla pepper (less spicy) or 2 jalapeno peppers (more spicy)
1 chili in adobo

1 can hominy

More salt to taste

Peel, seed, and slice the squash into pieces about 1/2" thick. Toss with salt, pepper and olive oil, and arrange in a single layer on a baking sheet. Bake at 400 until a little brown around the edges. This will take a while, so in the meantime,

Chop the onion, celery, carrot, and garlic. Saute them on medium heat with a dash of oil and salt in a large, heavy bottomed saucepan. Mine is about a gallon size. When the onions are starting to go transparent, add the chicken. It's fine to use frozen, I always do. Poke the chicken to the bottom of the pan and let it brown a little, then fill the pot about 1/2 way up with water. Bring to a boil, then add the cumin, oregano, and chop the peppers and add them too. Cook until the chicken is done through, then drain and add the hominy. Boil gently until the chicken is starting to fall apart and you can mash it into bits with a wooden spoon.

By this time the squash is probably done. Take about 1/3 of the cooked squash and coarsely chop it. The rest can be used for something else. Add the chopped squash to the soup, taste for salt, and cook until the soup has thickened slightly and all the flavors have blended, about 15-20 minutes.

You should really eat this with tortillas and fresh cilantro, but I didn't have the energy to make tortillas today, and I was out of cilantro. More thoughts:

1. The original version of this used port rather than chicken, and I think I like that better. If you use pork, use a nice fatty cut.
2. You have to use enough salt. All the veggies add a lot of natural sugars, and the salt balances it out.
3. Skip the carrot? I ended up thinking it was unnecessary with the squash.
4. Consider using a different squash. Butternut is very easy to use, but it is quite sweet, which increases the need for salt. Kabocha or Hubbard squash might be a better fit.

I am still computerless, so I have no photos, but I got a message from Office Max saying my order has shipped, so I am excited.

*12/8/13 I now am have computer! So Excite. Picture enabled!

Tuesday, November 19, 2013

Ok, ok, the hoopla is accurate.

I don't have a picture right now because my computer died and the process of trying to replace it so I can get a decent pic uploaded is unspeakably irritating.

But but but! It really is true that you can make amazing bread without kneading it. You stir it with a spoon for a minute then stick it in the fridge overnight. Recipe:

425 g bread flour
350 g water
4 g  yeast
7 g salt

Put everything in a biggish bowl and stir it up until all the flour is incorporated, maybe a minute. Cover bowl and stick it in the fridge until tomorrow some time. Or the next day or the next. It's not that important.

When you want to use it, pre-heat the oven to 465. Not a typo. That's about halfway between 450 and 475.

Dump a handful of flour onto a cutting board and spread it out a bit. Dump the dough out of the bowl onto the flour. Grab the edges of the sloppy dough puddle and fold them in to the middle in about 4 or 5 places, until it is vaguely loaf shaped. Should take 30 seconds. Grab the loaf and plop it onto a metal cookie sheet or a loaf pan with the folds on the bottom so they stay put. Wait about 45 minutes. Slash the top of the loaf if you feel fancy, bake it for 35 minutes.  Ta dah!

The internets are swarming with rave reviews of this recipe. I am always skeptical of anything that gets that much fuss, and I have encountered in person several purported 'no knead breads' that were not all that good. In fact they were pretty blah. Sheer laziness made me try this. I got my procedural advice from several  different sources. The one claiming it is easy enough that a 4 year old can do it gives me hope that I can make David do it, since he is the primary bread eater in the house at the moment.

I think all of the advice offered is valid, but I have some opinions of my own, of course.

1. Use bread flour. Duh. I have no idea why there are recipes out there that say to use all purpose.
2. You don't need a pizza stone, or anything else. Just use a thin metal pan. Not one of those insulated ones.
3. You don't need to put a pan of water in the oven to encourage the crust to get crispy either. If you really want crust, just leave it in 5 minutes longer.
4. Ignore all the fussy things about using parchment paper and pastry cloths, and damp towels and blah blah blah room temperature blah what. It just doesn't matter.
5. The only things that do seem to matter are that you need to make the dough very wet, almost like batter to start with, and then leave it to sit for a long time.
6. Don't bother washing the mixing bowl. You know you're going to want more bread in a couple days, just mix the next batch. So what if there's a little leftover dough in the bowl?
7. Ovens vary. If your bread is too dry, cook it 5 minutes less. If your bread is too gummy, cook it more. Simple!
8. I hate parchment paper. Totally unnecessary. Just another thing that gets thrown away.


But what does it taste like? It tastes like all those expensive $5.00 'artisan boules' you can get at 'boulangeries' and Whole Foods. But even fresher. No foolin'. Back when I was messing around with complicated procedures trying to get my baguettes to turn out like the ones that you buy from fancy bakeries, I should have been doing this instead. It's crunchy, and chewy, and the inside has the right amount of holes, and it's this beautiful slightly golden color.

I'm going to try mixing multiple batches of dough at once and keeping them in the fridge, apparently that's perfectly feasable.

Saturday, October 26, 2013

Epic Sock Project


It took me a year and a half to knit these socks. Mostly, I am just really glad to be done with them.

The technical stuff:

They are made of wool that I unraveled from a sweater that was really well made but terribly unflattering. Gauge, about 9 stitches/inch. Needles are a 000 40" circular, which I chose because I knitted them 2 at a time toe-up.


They are far from perfect, because I fall much closer to the "project knitter" side of things than the "process knitter" side.

Things I like about them:

The ribbing at the top looks nice. I learned a new bind-off technique that allows the top edge to stretch very easily.
The fit at the ankle is nice and snug. No wrinkles or sags.
They're toasty warm- 100% merino!


Things I don't like:

That lace pattern isn't very stretchy. The ankles stay snug, but the knees don't.
And I really could have thought out the calf increases better. They're a little clunky looking.


Naturally, even though I swore the whole time that I would never do such a thing again, I started thinking about how to make the next pair better the minute I got these off the needle.We'll just have to wait  and see if that really happens.


Wednesday, October 23, 2013

BWAHAHAH!


Last night David brought home this giant-ass pumpkin.

Me: Ohmigod. Is that China? And Taiwan?
Him: It's the 'One China'.
Me: HAHAHAHAHA!

Me: Who the hell puts China on a pumpkin?
Him: I dunno...Chinese People?
Me: No dude, not even Chinese people would China on a pumpkin.

Me: Is that the Korean peninsula?
Him: I was thinking about it then I was like, nah, that's too hard.
( It occurs to me that China probably thinks the same thing)

Him: I was paying tribute to your people!

Thursday, October 17, 2013

Noodle Soup


I feel like crap today, as I have felt for about 6 days now. I'm getting right tired of it. Meanwhile, here is a bowl of soup. I did not eat this soup today; I did not eat much of anything in fact, due to the crap-feeling business, but looking at this picture of soup from some time ago makes me feel better, so here it is.

There is fried tofu, and greens, plus noodles in fish broth, and I decorated it with minced ginger, green onions, and mushroom fluff. There is nothing mysterious about it (except maybe the mushroom fluff), it's just soup. It only looks pretty for about 30 seconds before you stir it up in to a mess and slurp it up, but those are an important 30 seconds, I think.